
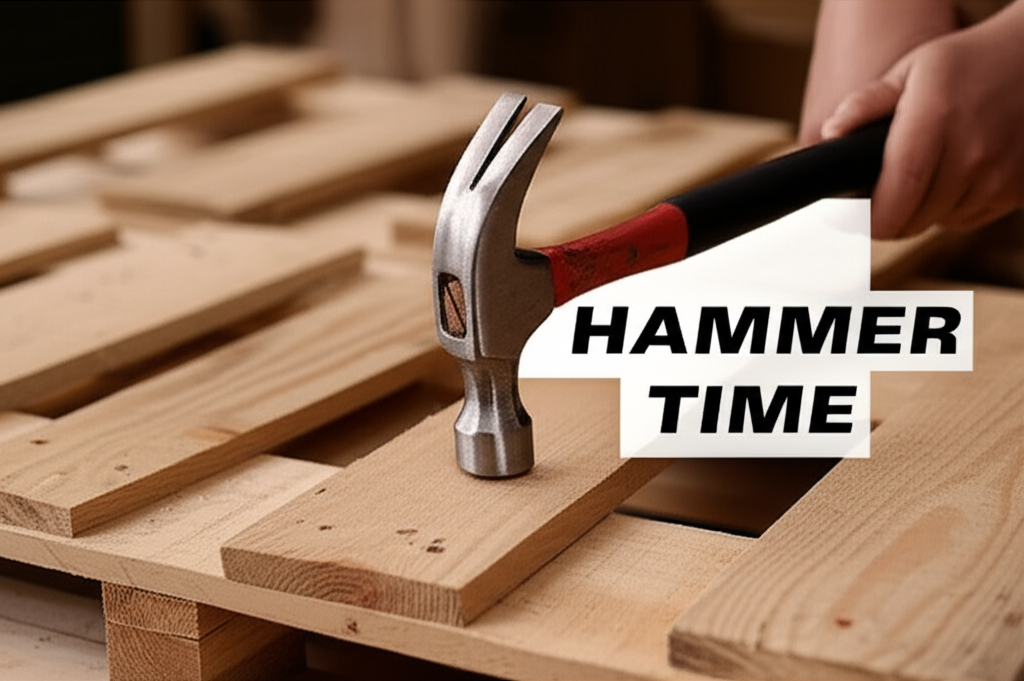
Introduction: The Allure of the Pallet Table and Your Trusty Hammer
In the world of DIY furniture, pallet tables have carved out a significant niche. Their rustic charm, affordability, and inherent sustainability make them an incredibly attractive project for crafters and homeowners alike. While many might associate pallet table construction with an array of specialized tools, it’s entirely possible, and often quite satisfying, to create a sturdy and stylish table using little more than a hammer. This guide will walk you through the process, from selecting the right pallets to the final finishing touches, emphasizing how to leverage the power of a hammer to achieve a fantastic result.
Must-Have Tools in Your House If You Work Regularly


Why Build a Pallet Table?
The appeal of a DIY pallet table is multifaceted:
- Cost-Effectiveness: Pallets are often free or very inexpensive, making this a budget-friendly furniture option.
- Sustainability: Repurposing discarded pallets diverts waste from landfills and reduces the need for new materials.
- Customization: You have complete control over the size, shape, and finish to perfectly suit your space and style.
- Satisfaction: There’s immense pride in creating something beautiful and functional with your own hands.
- Unique Aesthetic: The natural imperfections and grain of pallet wood lend a distinct, charming character to the finished piece.
Can You Really Build a Pallet Table with Just a Hammer?
While a hammer is your primary tool, it’s important to clarify what “just a hammer” entails. You’ll primarily be using it for disassembly, joining, and potentially some minor shaping or persuasion. However, for safety and efficiency, a few other basic items are highly recommended, even if not strictly “tools” in the power-tool sense. We’ll cover these in the “Essential Materials and Tools” section. The core of the construction, however, will rely on the strength and versatility of your hammer.
Table 1: Key Facts and Comparison: Pallet Table Construction Methods
This table highlights the key differences between building a pallet table primarily with a hammer versus using more advanced power tools.
| Feature | Hammer-Only Method | Power Tool Method |
| :——————– | :————————————————— | :—————————————————- |
| Primary Tool | Hammer | Circular Saw, Jigsaw, Drill, Sander, Nail Gun |
| Disassembly Effort| Higher; requires prying and careful hammering | Lower; cuts through wood easily |
| Assembly Speed | Slower; relies on manual nailing and screwing | Faster; powered fastening and cutting |
| Precision Cutting | Limited; relies on accurate hammer blows and chisels | High; precise cuts with saws |
| Sanding | Manual; time-consuming | Mechanical; much faster and smoother |
| Skill Level | Accessible; basic hammering skills needed | Intermediate to Advanced; requires operating power tools |
| Cost of Tools | Low | Moderate to High |
| Project Time | Longer | Shorter |
| Rustic Appeal | Often enhanced by manual process | Can be achieved with careful finishing |
Phase 1: Sourcing and Preparing Your Pallets
The foundation of any successful pallet table project lies in selecting the right pallets and preparing them properly.
Finding Suitable Pallets
Not all pallets are created equal, and some can pose health risks. Look for pallets that are:
- Heat-Treated (HT): These pallets are marked with an “HT” stamp, indicating they were treated with heat, not chemicals. Avoid pallets marked “MB” (Methyl Bromide), as this is a chemical fumigant.
- In Good Condition: Look for pallets with minimal damage, rot, or mold. Some minor cracks or missing boards are acceptable, as these can often be repaired or worked around.
- Clean: Try to find pallets that appear relatively clean and free from spills or heavy contamination.
- Of Similar Size: If you’re aiming for a consistent look, try to source pallets of the same dimensions.
Common places to find pallets include:
- Local businesses (supermarkets, hardware stores, garden centers) – always ask permission first!
- Construction sites (again, ask permission)
- Industrial areas
- Online marketplaces (often listed for free or a small fee)
Essential Materials and Tools (Beyond the Hammer)
While the hammer is king for this project, these items will make the process safer, easier, and yield better results:
Tools:
- Hammer: A good quality claw hammer is essential for both disassembly and assembly. A heavier hammer might be useful for driving nails, while a lighter one offers more control.
- Pry Bar/Crowbar: Crucial for separating pallet boards without excessive damage. A flathead screwdriver can also serve as a mini-pry bar for smaller gaps.
- Safety Glasses: Absolutely non-negotiable. Flying wood splinters and nails are a real hazard.
- Work Gloves: Protect your hands from splinters and rough wood.
- Measuring Tape: For accurate measurements and planning.
- Pencil: For marking cuts or assembly points.
- Optional (but highly recommended):
- Hand Saw: For cutting boards to size if needed.
- Sandpaper (various grits): From coarse (60-80) for initial smoothing to fine (120-220) for finishing.
- Sturdy Surface/Workbench: To work on.
Materials:
- Pallets: The star of the show!
- Sandpaper: (mentioned above)
- Wood Glue: For reinforcing joints.
- Fasteners:
- Nails: Various sizes, suitable for the thickness of your wood.
- Screws: Wood screws are generally stronger and easier to remove if you make a mistake. Consider exterior-grade screws if the table will be used outdoors.
- Wood Finish: Stain, paint, polyurethane, wax, or oil, depending on your desired look and protection.
- Optional: Casters, additional wood for legs or frame, decorative elements.
Disassembling the Pallets: The Hammer’s Role
This is where your hammer truly shines. The goal is to separate the boards from the stringers (the thicker support beams) with minimal damage.
- Inspect the Pallet: Identify the nails holding the deck boards to the stringers.
- Position the Pry Bar: Slide the claw of your hammer or the pry bar between the deck board and the stringer, as close to a support nail as possible.
- Leverage and Lift: Gently apply pressure to the hammer handle or pry bar to lift the deck board. You might need to tap the pry bar with your hammer to get it started.
- Hammer Taps: If a board is stubborn, use the claw of your hammer to carefully pry or to tap the pry bar further under the board. You can also use the hammer head to gently tap the ends of the deck boards, working them loose from the nails.
- Nail Removal: Once a board is mostly free, use the claw of your hammer to pull out any remaining nails. Protect the wood by placing a scrap piece of wood under the hammer claw.
- Work Systematically: Work your way along the pallet, prying and hammering gently to avoid splitting the wood. For particularly tough nails, a few strategic taps with the hammer head on the nail shaft can help loosen it.
Cleaning and Sanding the Wood
Once disassembled, your pallet boards will likely be rough, dirty, and splintery.
- Brush Off Debris: Use a stiff brush to remove loose dirt, cobwebs, and any other surface grime.
- Inspect for Hazards: Carefully examine each board for any remaining nails or staples. Remove them with your hammer’s claw.
- Rough Sanding: Start with coarse-grit sandpaper (60-80 grit). This is best done manually, or if you have a sanding block, it can help create a flat surface. Focus on removing splinters, rough patches, and any ingrained dirt. Your hammer can be used to gently tap down any proud nail heads or splinters that resist sanding.
- Medium Sanding: Move to medium-grit sandpaper (100-120 grit) to further smooth the wood.
- Fine Sanding: Finish with fine-grit sandpaper (150-220 grit) for a smooth, touchable surface.
- Simple Tabletop: Use one or two pallets as the main surface.
- Layered Top: Overlap boards for a more intricate pattern.
- Added Features: Incorporate drawers, shelves, or a raised edge.
- Leg Options:
- Pallet Wood Legs: Cut and assemble thicker pallet wood pieces or stringers.
- Pre-made Legs: Purchase hairpin legs, metal pipe legs, or wooden furniture legs.
- Other Materials: Use cinder blocks, sawhorses, or even more pallets to support the tabletop.
- Chamfering Edges: While difficult to do perfectly with just a hammer, you can use the claw to gently scrape or chip away small amounts of wood to create a slightly beveled edge. This is more for rustic effect than precision.
- Creating Texture: Strategic, light taps with the hammer head can create intentional dents or marks for a distressed look.
- Lay Out Your Boards: Arrange your prepared pallet boards in your desired pattern on a flat surface.
- Apply Wood Glue: Apply a bead of wood glue along the edges where boards will meet.
- Join the Boards:
- Nailing: Place your boards together and use your hammer to drive nails through one board into the edge of another. Start with a few taps to set the nail, then drive it home with firmer blows. Ensure the nail heads are flush or slightly countersunk with the wood surface.
- Screwing: If using screws, you can pre-drill pilot holes with a sharp nail and hammer to make insertion easier, then drive the screws in with a hammer handle (if the screw head fits) or a screwdriver. For better results and ease of use, a manual screwdriver or a hand drill is highly recommended here.
- Clamping (Optional but Recommended): If you have clamps, use them to hold the boards tightly together while the glue dries and you nail/screw.
- Position the Pallets/Sections: Arrange them to form your desired tabletop size and shape.
- Secure Them Together: Use your hammer to drive long nails or screws through overlapping sections of the pallet structure. You can also use wood glue on any joining surfaces for added strength.
- Position the Legs: Place your prepared legs or purchased leg hardware at the desired locations on the underside of the tabletop.
- Pre-Drill Pilot Holes: Use a sturdy nail and hammer to create small pilot holes where you intend to drive screws. This prevents the wood from splitting.
- Fasten the Legs: Drive wood screws through the leg mounting plates or directly into the legs and the tabletop. Use your hammer to gently tap screws into place if they start to wobble, ensuring they are driven straight.
- Final Sanding: If you didn’t have a chance to do a thorough sanding earlier, or if assembly has created new rough spots, now is the time. Use your hammer to tap down any proud nail heads or splinters before sanding.
- Progressive Grits: Work from coarser grits (100-120) to finer grits (150-220) for a smooth finish.
- Edge Sanding: Pay particular attention to the edges and corners of your tabletop and legs for a comfortable feel.
- Cleaning: Wipe down the entire table with a tack cloth or a slightly damp cloth to remove all dust particles.
- Staining: Apply wood stain with a brush or rag, wiping away any excess. Allow it to dry completely according to the product instructions.
- Painting: Apply primer if necessary, then apply your chosen paint color. Multiple thin coats are usually better than one thick coat.
- Sealing/Varnishing: For durability and protection, especially for tabletops, apply a clear coat of polyurethane, varnish, or a wax finish.
- Application: Use a brush for polyurethane/varnish or a clean cloth for wax.
- Multiple Coats: Apply 2-3 thin coats of varnish or polyurethane, allowing adequate drying time between coats and lightly sanding with very fine grit (220-320) after each coat for a smoother finish.
Phase 2: Designing and Assembling Your Table
With your wood prepared, it’s time to bring your table to life.
Conceptualizing Your Design
The simplest pallet table involves using whole or cut pallets as the tabletop and adding legs. However, you can get more creative.
Measure your space to determine the desired dimensions for your table.
Cutting and Shaping with Your Hammer (and Saw)
If you’re using a hand saw, measure and mark your cut lines clearly with a pencil. For straight cuts, use your hammer to gently tap the saw blade to start the cut, guiding it along the line.
Your hammer can also be used for minor shaping:
Assembling the Tabletop
If you’ve disassembled your pallets and are reassembling the boards for a custom tabletop, this is where your hammer’s fastening power comes in.
If you’re using whole pallets or larger sections:
Attaching Legs
This is a critical step for stability.
Table 2: Pros and Cons of Using a Hammer for Pallet Table Construction
This table summarizes the advantages and disadvantages of relying primarily on a hammer for your pallet table project.
| Category | Pros | Cons |
| :——— | :————————————————————————————————– | :————————————————————————————————————- |
| Cost | Low initial tool investment; pallets are often free. | Can be more time-consuming, which has an indirect cost if your time is valuable. |
| Skill | Accessible to beginners; basic hammering skills are sufficient. | Achieving perfectly straight cuts or precise joinery is challenging without additional tools. |
| Time | Potentially longer build time, especially for disassembly and sanding. | Faster for simple assembly of pre-cut or whole pallet sections. |
| Effort | Requires significant manual labor for disassembly, sanding, and fastening. | Less physical strain compared to operating heavy power tools, but repetitive hammering can be tiring. |
| Aesthetics | Can naturally lend itself to a more rustic, handcrafted look. | Achieving a perfectly smooth, factory-like finish is very difficult without power sanding. |
| Tools | Only requires a fundamental tool (hammer) and basic safety gear. | Limited precision in cutting and shaping; manual sanding is labor-intensive. |
| Safety | Generally safer than power tools if proper precautions are taken (gloves, eye protection). | Risk of hammer slips, dropped wood, or flying nails if not careful. |
| Portability | Tools are easily portable for working in different locations. | The finished table’s weight will depend on the pallet wood and design, not the tools used. |
Phase 3: Finishing Touches
The final steps elevate your raw pallet table into a finished piece of furniture.
Sanding for Smoothness
Even with careful disassembly, pallet wood can be rough.
Applying Your Chosen Finish
This is where you impart your personal style and protect the wood.
Conclusion: Your Hammer-Built Masterpiece
Creating a pallet table using primarily a hammer is a rewarding endeavor that showcases the power of resourcefulness and a few fundamental tools. The process requires patience, a bit of muscle, and an appreciation for the rustic beauty of reclaimed wood. While power tools can speed up the process and offer greater precision, the satisfaction of building a functional and stylish piece of furniture with the humble hammer is undeniable. Embrace the journey, enjoy the process, and proudly display your unique, hammer-crafted pallet table!
html
<h2>Key Facts and Comparison for Creating a Pallet Table</h2>
<table>
<thead>
<tr>
<th>Feature</th>
<th>Pallet Wood</th>
<th>Other Common Table Materials</th>
</tr>
</thead>
<tbody>
<tr>
<td><strong>Cost</strong></td>
<td>Very Low (often free or inexpensive)</td>
<td>Moderate to High (depending on wood type, metal, glass)</td>
</tr>
<tr>
<td><strong>Availability</strong></td>
<td>Widely available from shipping yards, warehouses, construction sites</td>
<td>Readily available at lumber yards, hardware stores, online retailers</td>
</tr>
<tr>
<td><strong>Durability</strong></td>
<td>Can be durable if selected and assembled properly; may vary in hardness</td>
<td>Generally high durability, consistent quality (e.g., hardwoods, metal)</td>
</tr>
<tr>
<td><strong>Aesthetics</strong></td>
<td>Rustic, weathered, industrial look; unique grain patterns</td>
<td>Wide range of aesthetics from modern to traditional, smooth finishes</td>
</tr>
<tr>
<td><strong>Skill Level Required</strong></td>
<td>Beginner to Intermediate (requires basic woodworking skills)</td>
<td>Beginner to Advanced (depending on complexity and material)</td>
</tr>
<tr>
<td><strong>Tools Needed</strong></td>
<td>Hammer, pry bar, saw, sander, screws/nails</td>
<td>Varies greatly depending on material and design (saws, drills, sanders, adhesives, welding equipment, etc.)</td>
</tr>
</tbody>
</table>
<h2>Steps, Pros, and Cons of Building a Pallet Table</h2>
<table>
<thead>
<tr>
<th>Stage/Aspect</th>
<th>Description</th>
<th>Pros</th>
<th>Cons</th>
</tr>
</thead>
<tbody>
<tr>
<td rowspan="3"><strong>1. Sourcing Pallets</strong></td>
<td>Finding suitable pallets (avoiding chemically treated ones, checking for damage)</td>
<td>Low cost or free; potential for unique character</td>
<td>May require searching; need to identify heat-treated (HT) vs. methyl bromide (MB) treated pallets; some may be damaged.</td>
</tr>
<tr>
<td><strong>2. Disassembly</strong></td>
<td>Carefully taking apart the pallet using a hammer and pry bar to salvage usable wood.</td>
<td>Maximizes material use; preserves wood grain and character.</td>
<td>Can be time-consuming and physically demanding; risk of splitting or damaging wood.</td>
</tr>
<tr>
<td><strong>3. Preparation</strong></td>
<td>Cleaning, sanding, and cutting the wood to the desired size and shape for the table.</td>
<td>Creates a smooth, safe surface; allows for customization of design.</td>
<td>Sanding can be dusty and labor-intensive; ensuring straight cuts requires precision.</td>
</tr>
<tr>
<td rowspan="2"><strong>4. Assembly</strong></td>
<td>Using a hammer and nails (or screws) to join the prepared wood pieces into a table structure.</td>
<td>Relatively straightforward using basic tools; satisfying process.</td>
<td>Hammering can be loud; improper nailing can split wood or create weak joints; accuracy is important.</td>
</tr>
<tr>
<td><strong>5. Finishing</strong></td>
<td>Applying stains, paints, or protective sealants to enhance appearance and durability.</td>
<td>Protects the wood; allows for personalization of the table's look.</td>
<td>Requires careful application for an even finish; drying times need to be considered.</td>
</tr>
<tr>
<td colspan="2"><strong>Overall Pros of Pallet Tables</strong></td>
<td colspan="2">Eco-friendly (upcycling), cost-effective, unique rustic aesthetic, customizable, beginner-friendly DIY project.</td>
</tr>
<tr>
<td colspan="2"><strong>Overall Cons of Pallet Tables</strong></td>
<td colspan="2">Variable wood quality and availability, potential for splinters and rough surfaces if not prepared well, potential for embedded nails or debris, can be less durable than professionally manufactured tables depending on construction.</td>
</tr>
</tbody>
</table>