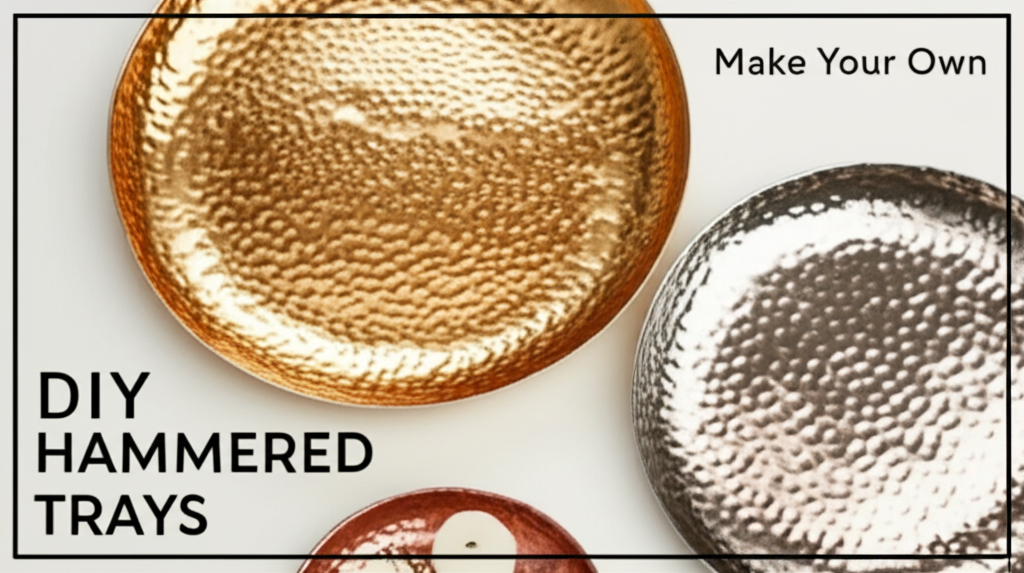
Introduction: Crafting Timeless Elegance with Hammered Trays
In the realm of home décor, there’s a unique satisfaction derived from creating something beautiful with your own hands. DIY projects not only allow for personalization but also inject a sense of warmth and character into your living space that mass-produced items often lack. Today, we embark on a journey to create a stunning set of hammered decorative trays, pieces that exude a rustic charm and sophisticated elegance. Hammered metal, with its textured surface and subtle play of light, adds a touch of artisanal craftsmanship to any setting, whether it’s holding your morning coffee, displaying cherished mementos, or serving guests in style.
Must-Have Tools in Your House If You Work Regularly


This comprehensive guide will walk you through every step of the DIY hammered decorative tray set creation process. We’ll cover everything from selecting the right materials and tools to the intricate hammering techniques and finishing touches. Whether you’re a seasoned crafter or a beginner looking to try something new, this project is designed to be accessible and rewarding. Get ready to transform simple metal sheets into unique, eye-catching decorative pieces that will undoubtedly become conversation starters.
Understanding the Appeal of Hammered Metal
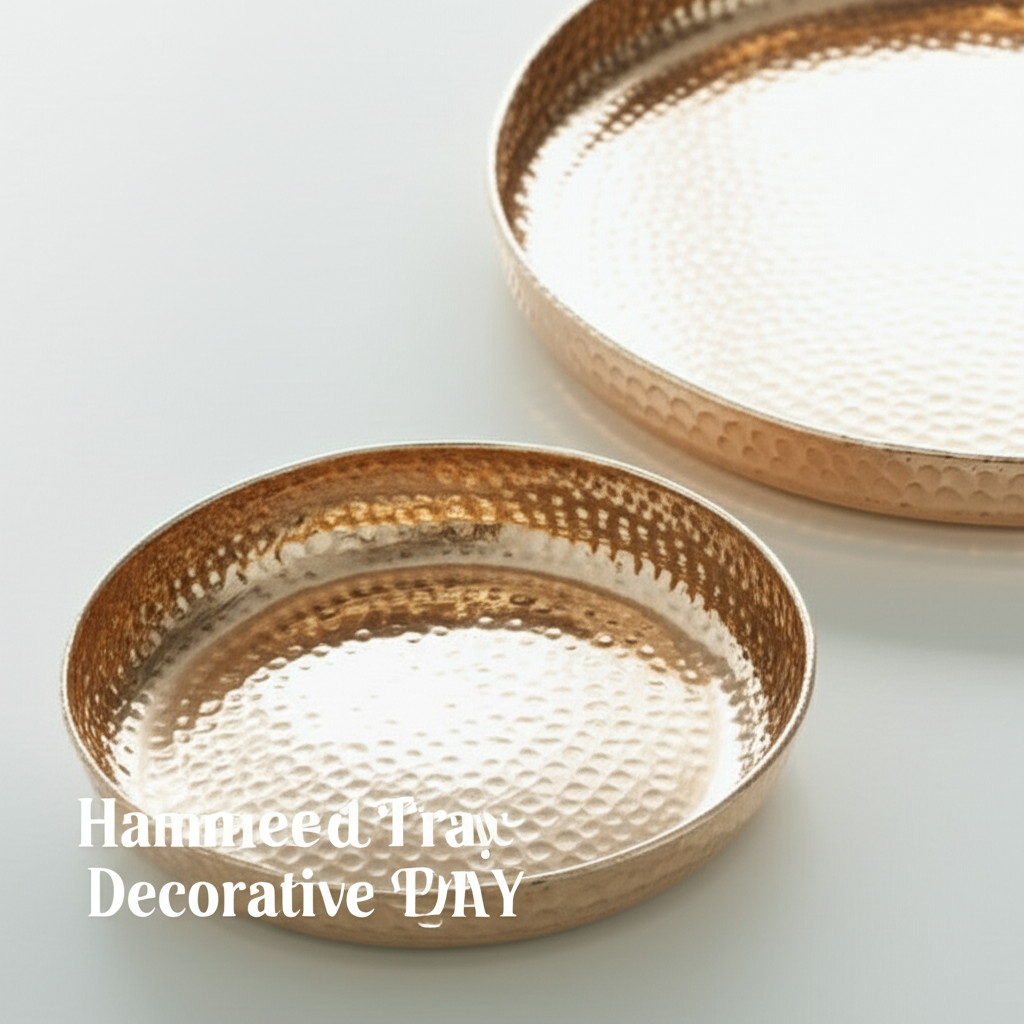
Hammered metal has been a celebrated medium in art and craft for centuries. The process of shaping and texturing metal with a hammer creates a distinctive aesthetic characterized by:
- Unique Texture: Each hammer mark is a testament to the maker’s touch, creating an irregular, organic surface that catches light beautifully.
- Durability and Longevity: Metal, especially when properly finished, is incredibly durable and can last for generations.
- Versatility: Hammered metal can be incorporated into various décor styles, from rustic farmhouse and industrial chic to modern minimalist with a touch of warmth.
- Tactile Experience: The textured surface invites touch, adding a sensory dimension to the decorative piece.
- Artisanal Charm: The visible hammer marks lend an air of handcrafted authenticity, setting it apart from perfectly smooth, machine-made items.
Materials and Tools: Gearing Up for Your Project
To create your DIY hammered decorative tray set, you’ll need a selection of specific materials and tools. Investing in quality tools will not only make the process easier but also yield better results.
Essential Materials:
- Metal Sheets:
Copper: Known for its warm hue and malleability, copper is an excellent choice for beginners and offers a classic, rich look.
Brass: Similar to copper in workability, brass offers a slightly different golden tone and is equally beautiful.
Aluminum: Lightweight and easy to work with, aluminum can be a more budget-friendly option and takes well to various finishes.
Steel (Stainless or Mild): Offers greater durability and a more industrial look. Mild steel will require protection against rust.
Consider the gauge (thickness) of your metal. A gauge between 18 and 22 is generally manageable for hammering.
- Wooden Base/Frame (Optional): For added stability and a finished look, you might consider using pre-made wooden trays or crafting your own wooden base to which the metal sheet will be attached.
- Adhesive:
Strong Epoxy or Construction Adhesive: For securely attaching the metal to a wooden base.
Metal Rivets or Small Screws: An alternative or supplementary method for attaching metal to wood.
- Metal Cleaner/Degreaser: To ensure a clean surface for hammering and finishing.
- Finishing Sealant/Lacquer: To protect the metal from tarnishing and oxidation, especially for copper and brass. Clear acrylic spray or a specialized metal sealant works well.
- Gloves: To protect your hands from sharp metal edges and cleaning agents.
- Safety Glasses: Crucial for protecting your eyes from flying debris or metal shavings.
- Work Surface Protection: Old newspapers, cardboard, or a drop cloth to protect your work area.
Essential Tools:
- Hammer:
Ball-Peen Hammer: The rounded end (peen) is ideal for creating uniform, overlapping indentations on metal.
Chasing Hammer: Lighter and more balanced for finer detail work and controlled hammering.
You might want both for different effects.
- Anvil or Bench Block:
Steel Bench Block: A flat, hardened steel block provides a solid surface for hammering, minimizing rebound and helping to flatten the metal.
Small Anvil: Offers a more substantial surface and can be useful for larger pieces.
- Metal Shears or Tin Snips: For accurately cutting the metal sheets to size.
- Measuring Tape or Ruler: For precise measurements.
- Marker or Scribe: For marking cutting and hammering lines.
- Sandpaper or Metal File: For deburring and smoothing sharp edges after cutting. Various grits (e.g., 120, 220, 400) might be useful.
- Cleaning Cloths or Rags: For cleaning and applying finishes.
- Workbench or Sturdy Table: A stable surface to work on.
- Clamps (Optional): To hold the metal in place while cutting or if attaching to a wooden base.
Key Facts and Comparison of Metal Options
Here’s a quick overview of popular metal choices for hammered trays:
| Metal Type | Appearance | Workability | Durability | Tarnishing/Oxidation | Cost |
|---|---|---|---|---|---|
| Copper | Warm, reddish-brown, develops a patina | Excellent, very malleable | Good | Tarnishes readily, requires sealing | Medium-High |
| Brass | Golden yellow, warm sheen | Excellent, malleable | Good | Tarnishes, requires sealing | Medium-High |
| Aluminum | Silvery-gray, matte or shiny | Very Good, lightweight | Moderate | Oxidizes (forms a dull gray layer), less prone to deep tarnish than copper/brass | Low-Medium |
| Stainless Steel | Silver-white, modern | Good, requires more force | Excellent | Resists tarnishing and corrosion | Medium |
Step-by-Step Guide to Creating Your Hammered Tray Set
This guide assumes you are creating metal trays that will be used decoratively or as inserts into existing wooden bases. If you’re building wooden bases from scratch, that will involve woodworking steps prior to attaching the metal.
Step 1: Planning and Design
- Determine Tray Sizes: Decide on the number of trays you want in your set and their dimensions. Consider creating a nested set where trays fit within each other, or a collection of similarly sized trays.
- Sketch Your Design: Draw out your desired shapes and sizes. This will help you visualize the final product and calculate material needs.
- Consider Edge Finish: Will your trays have straight edges, or will you fold them over for a finished look? Folding requires slightly larger metal sheets.
Step 2: Cutting the Metal
- Measure and Mark: Using your ruler and marker/scribe, carefully measure and mark the dimensions of your trays onto the metal sheet.
- Secure the Metal: Ensure the metal sheet is stable on your workbench. You might need to clamp it down for larger pieces.
- Cut with Shears: Using metal shears or tin snips, carefully cut along your marked lines. Go slowly and steadily for clean cuts. For curved shapes, make a series of small cuts rather than one continuous one.
Step 3: Preparing the Edges
- Deburr: Metal edges can be very sharp after cutting. Use a metal file or sandpaper (start with a coarser grit like 120 or 180) to gently file down any sharp burrs or rough edges.
- Smooth: Once the sharp edges are removed, use finer grit sandpaper (220, then 400) to smooth the edges. This step is crucial for safety and a professional finish.
Step 4: The Hammering Process
This is the heart of the project. The key is consistent, overlapping hammer strikes.
- Prepare Your Workspace: Place the metal sheet on your steel bench block or anvil. Ensure good lighting.
- Start Hammering:
Hold the ball-peen hammer comfortably.
Begin striking the metal with the rounded peen end. Aim for consistent pressure and spacing between each strike.
Work in a pattern, creating overlapping dimples. You can work in rows, or in a circular motion.
Turn the metal sheet periodically to ensure even hammering across the entire surface.
As you hammer, the metal will naturally start to curve or bowl. This is part of the aesthetic. If you want a flatter tray, you can periodically flip the metal and hammer the underside to flatten it, or use the flat face of the hammer on your bench block.
For a more intricate texture, experiment with different angles of hammer strikes and varying the distance between them.
- Tip for Evenness: Many crafters use a guide or lay down a pattern of the desired hammer mark spacing on paper and place it underneath the metal to help maintain consistency.
Step 5: Shaping and Finishing Edges (Optional but Recommended)
- For a Folded Edge: If you desire a cleaner, finished edge, you’ll need to make a slightly larger initial cut to allow for a fold.
After hammering the main surface, use the flat side of your hammer (or a slightly rounded hammer face) and the edge of your bench block to carefully fold the edges of the metal over by about 1/4 to 1/2 inch. This requires controlled, precise hammering.
You can also use pliers to help start the fold.
- For a Simple Edge: If you’ve simply deburred and smoothed the edges, you’re ready for the next step.
Step 6: Cleaning and Preparation for Finishing
- Thorough Cleaning: Use a metal cleaner or degreaser to remove any oil, fingerprints, or debris from the hammered surface. A clean surface is essential for the sealant to adhere properly.
- Wipe Down: Use clean, lint-free cloths to thoroughly wipe down the metal.
Step 7: Applying the Protective Finish
- Choose Your Sealant: Select a clear acrylic spray or a metal-specific lacquer.
- Ventilation: Work in a well-ventilated area, preferably outdoors or in a garage with open doors.
- Apply Even Coats: Hold the spray can at the recommended distance (usually 8-12 inches) and apply thin, even coats. Avoid applying too much at once, as this can lead to drips and an uneven finish.
- Allow to Dry: Let each coat dry completely according to the product’s instructions before applying the next. You might need 2-3 coats for adequate protection.
- Curing Time: Be aware of the full curing time for your sealant, as the metal may still be susceptible to marks until fully cured.
Step 8: Attaching to Wooden Bases (If Applicable)
- Prepare the Base: Ensure your wooden base or tray is clean and smooth. You may want to stain or seal the wood at this stage if you haven’t already.
- Position the Metal: Place the hammered metal tray onto the wooden base, ensuring it’s centered and aligned correctly.
- Adhere:
Epoxy/Construction Adhesive: Apply a generous, even bead of adhesive to the underside of the metal tray or the surface of the wooden base. Carefully press the metal onto the wood. Use clamps to hold it securely in place while the adhesive dries, following the manufacturer’s instructions for curing time.
Rivets/Screws: If you want a more mechanical attachment, you can pre-drill small pilot holes through the metal (if it’s soft enough) and into the wood. Then, secure the metal using small rivets or screws. Be mindful of where these will be placed so they don’t detract from the aesthetic.
Pros and Cons of DIY Hammered Trays
Here’s a breakdown of the advantages and disadvantages of undertaking this project:
| Pros | Cons |
|---|---|
| Unique and Personalized: Create pieces that perfectly match your décor style and color palette. | Time Commitment: Hammering can be time-consuming and requires patience. |
| Cost-Effective: Often cheaper than purchasing high-quality hammered metal trays from retailers. | Requires Specific Tools: You’ll need specialized hammers and a solid surface to work on. |
| Skill Development: Learn new crafting techniques and improve hand-eye coordination. | Sharp Edges: Requires careful handling and proper deburring to avoid injury. |
| Satisfaction and Pride: The reward of creating something beautiful with your own hands. | Potential for Imperfections: Inconsistent hammering can lead to an uneven look, especially for beginners. |
| Durable and Long-Lasting: Metal trays, when properly finished, can last a lifetime. | Tarnish Management: Copper and brass will require regular cleaning or re-sealing to maintain their luster. |
Tips for Achieving a Professional Finish
- Practice Makes Perfect: Before working on your final trays, practice hammering on scrap pieces of metal to get a feel for the hammer’s impact and develop a consistent rhythm.
- Work in Sections: For larger trays, divide the surface into manageable sections and complete each section before moving to the next.
- Vary Hammer Strike Patterns: Experiment with different patterns – uniform grid, random scattering, or concentric circles – to achieve unique textures.
- Consider the Light: The way light hits the hammered surface is key to its beauty. Think about where the tray will be placed and how the texture will be showcased.
- Don’t Over-Hammer: Too much hammering can thin or even tear the metal, especially thinner gauges.
- Cleanliness is Crucial: Always work with clean hands and clean metal to avoid transferring oils that can interfere with finishes.
Styling Your Hammered Tray Set
Once your DIY hammered tray set is complete, the fun of styling begins! Here are some ideas:
- Coffee Table Centerpiece: Group candles, a small vase with flowers, and a stack of books.
- Ottoman Tray: Perfect for corralling remotes, magazines, and drinks when used on an ottoman.
- Entryway Catch-All: Place keys, mail, and other essentials near your front door.
- Vanity Display: Organize perfumes, jewelry, and makeup on a dresser or vanity.
- Kitchen Counter Accent: Display olive oil bottles, salt and pepper grinders, or fresh produce.
- Bathroom Organizer: Hold soaps, lotions, and toiletries.
- Decorative Grouping: Display a collection of small sculptures, decorative orbs, or seasonal items.
Conclusion: Your Handcrafted Masterpiece Awaits
Creating a DIY hammered decorative tray set is a rewarding project that combines artistic expression with practical application. The tactile beauty of hammered metal, coupled with the satisfaction of crafting something unique, makes this an endeavor well worth your time and effort. With the right materials, tools, and a bit of patience, you can transform simple metal sheets into elegant statement pieces that will enhance your home décor for years to come. So, gather your supplies, embrace the process, and get ready to add a touch of handcrafted sophistication to your living space. Happy hammering!