Introduction: The Humble Hammer and the Mighty Concrete Project
For many DIY enthusiasts, the prospect of tackling concrete projects can seem daunting. From pouring a small patio extension to repairing a cracked driveway, the raw materials and the potential for error can be intimidating. However, with the right tools and a clear understanding of the process, these projects are well within reach. Among the most fundamental, yet often overlooked, tools in the concrete DIYer’s arsenal is the humble hammer. While not used for the primary mixing or pouring, the hammer plays a crucial role in preparation, finishing, and even troubleshooting. This guide will delve into the multifaceted applications of hammers in DIY concrete endeavors, ensuring you approach your next project with confidence and a well-equipped toolbox.
Must-Have Tools in Your House If You Work Regularly


Understanding the Hammer’s Role in Concrete Work
It’s important to clarify that a hammer isn’t the primary tool for shaping or smoothing wet concrete. Tools like trowels, floats, and edgers take center stage during the pouring and finishing phases. However, the hammer’s utility lies in its ability to address several critical aspects of concrete work, often behind the scenes. Its percussive force is ideal for breaking, shaping, and securing materials that interact with concrete or are used in its preparation and repair.
Hammer Types and Their Suitability for Concrete Tasks
Not all hammers are created equal, and selecting the right one for the job significantly impacts efficiency and safety. For concrete-related DIY, a few key types stand out:
- Claw Hammer: The classic choice for general construction, the claw hammer is versatile. Its primary use in concrete work might be for demolition (nail removal from forms) or light shaping of wooden formwork.
- Ball-Peen Hammer: With one flat face and one rounded (peen) face, this hammer is excellent for striking chisels and punches. This is invaluable when breaking up existing concrete or creating precise edges.
- Sledgehammer: For more significant demolition or breaking of concrete, a sledgehammer is indispensable. Its weight and leverage allow for powerful strikes.
- Rubber Mallet/Dead Blow Hammer: These softer-faced hammers are ideal for tasks where impact is needed without damaging surfaces. They are useful for tapping formwork into place or setting reinforcing bars without bending them.
- Masonry Hammer (Brick Hammer): Designed with a flat striking face and a chisel-like peen, this hammer is specifically suited for breaking and shaping masonry, including concrete.
Key Facts: Hammer Selection for Concrete Projects
| Hammer Type | Primary Concrete Application(s) | Weight Considerations | Notes |
| :—————– | :——————————————————————- | :—————————————– | :—————————————————————————- |
| Claw Hammer | Removing nails from formwork, light demolition, general utility | 16-24 oz (common for DIY) | Not ideal for direct concrete impact. |
| Ball-Peen Hammer | Striking chisels for breaking/shaping concrete, metalwork | 1-3 lbs | Essential for precision demolition and detailing. |
| Sledgehammer | Heavy demolition of existing concrete, breaking aggregates | 4-10 lbs (or more) | Requires significant force and control; safety gear is paramount. |
| Rubber Mallet | Tapping formwork, setting rebar, avoiding surface damage | 8-32 oz | Provides controlled impact. |
| Masonry Hammer | Breaking, chipping, and shaping concrete, brick, and stone | 2-3 lbs | Dual-purpose face is highly effective for masonry tasks. |
Preparation Phase: Setting the Stage for Success
Before you even think about mixing concrete, thorough preparation is key. The hammer often plays a vital role in this initial stage.
Demolition and Site Clearing
If your project involves removing existing concrete – perhaps to expand a patio or repair a section – demolition is your first step.
- Breaking Up Existing Concrete: For small-scale demolition, a sledgehammer is the go-to tool. Position your chisel (held by a partner or secured) on the concrete and strike it forcefully with the sledgehammer. Alternatively, you can use the sledgehammer directly on the concrete in a controlled manner to create fracture lines.
- Removing Formwork: After concrete has cured, you’ll need to remove the wooden or metal forms that contained it. A claw hammer is perfect for prying apart formwork, especially for extracting nails that might still be embedded. Work carefully to avoid damaging the newly formed concrete edges.
- Breaking Out Reinforcement: If you encounter rebar or mesh that needs to be cut or broken to remove old concrete, a masonry hammer or ball-peen hammer used with a cold chisel is effective.
Formwork Construction and Adjustment
Creating the molds that will shape your concrete is a critical step, and hammers assist in this process.
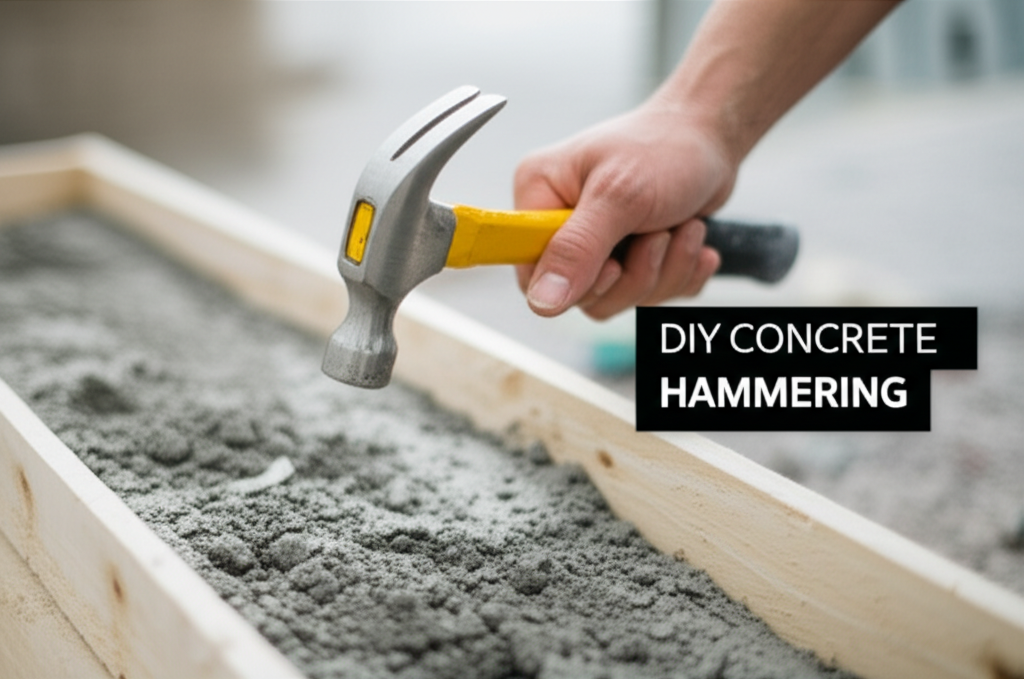
- Assembling Forms: Wooden formwork is typically constructed using nails or screws. A claw hammer is essential for driving nails to secure the boards that create your desired shape.
- Tamping and Securing: Once forms are in place, they need to be sturdy and level. A rubber mallet or a dead blow hammer can be used to gently tap formwork boards into alignment, ensuring they are flush and securely positioned without damaging the wood or the surrounding area.
- Adjusting Stakes: Stakes driven into the ground to support formwork might need slight adjustments. A hammer can be used to tap these stakes further into the ground or to loosen them for repositioning.
During the Pour and Finishing: Subtle but Significant Uses
While the hammer is not the primary tool for direct manipulation of wet concrete, its role continues during and immediately after the pour.
Consolidation and Vibrating
Proper consolidation is crucial for a strong, durable concrete finish, free from voids and air pockets.
- Light Tapping for Consolidation: For smaller pours or intricate areas, gently tapping the sides of the formwork with a rubber mallet or a hammer (with a block of wood to buffer the impact) can help to settle the concrete and release trapped air bubbles. This vibratory action encourages the aggregate to settle and the cement paste to fill all spaces.
- Securing Reinforcement: If you are working with rebar or mesh, you might need to secure it within the forms. A hammer can be used to lightly tap any protruding rebar to ensure it’s at the correct height and firmly seated in its position.
Edge Work and Detail
Creating clean, defined edges is a hallmark of a professional concrete finish.
- Chiseling and Shaping Edges: If, after the concrete has partially set, you need to refine an edge or remove a small imperfection, a masonry hammer paired with a cold chisel is the tool of choice. This allows for precise control in shaping corners or removing errant bits of concrete.
- Adjusting Screeds: Screeds are used to level the concrete surface. If the screed needs slight adjustments, a hammer might be used to tap the supports holding the screed in place.
Troubleshooting and Repairs: When Things Go Wrong (or Just Need a Tweak)
Even with the best planning, occasional issues can arise, and hammers are often called upon for repairs.
Breaking Out Faulty Sections
If a pour doesn’t go as planned, or you discover a defect after curing, you might need to remove a section.
- Targeted Demolition: For localized repairs, a ball-peen hammer and chisel are ideal for carefully breaking out a specific area of hardened concrete without affecting the surrounding material.
- Creating a Clean Break: When removing a section, use the hammer and chisel to create a relatively clean edge that you can then bond with new concrete.
Chipping Away Excess Material
Sometimes, concrete might cure with small protrusions or rough patches.
- Surface Finishing: A masonry hammer or ball-peen hammer with a chisel can be used to carefully chip away small amounts of excess concrete to achieve a smoother surface. Always use a light touch and work gradually.
Safety First: Hammering with Caution
Working with hammers, especially for demolition, requires a strong emphasis on safety.
Essential Safety Gear
- Safety Glasses/Goggles: Always wear safety glasses to protect your eyes from flying debris, concrete chips, or metal fragments.
- Work Gloves: Protect your hands from splinters, abrasions, and the shock of impact.
- Steel-Toed Boots: Essential for protecting your feet from falling tools or heavy materials.
- Hearing Protection: For extended periods of hammering, especially with sledgehammers or when breaking concrete, earplugs or earmuffs are recommended to prevent hearing damage.
Proper Hammer Technique
- Secure Grip: Hold the hammer firmly but not rigidly.
- Controlled Swings: Especially with heavier hammers, use controlled, fluid swings rather than jerky movements.
- Watch Your Fingers: Keep your fingers clear of the impact zone. If using a chisel, ensure your free hand is well away from the striking point.
- Know Your Tool: Understand the weight and balance of your hammer and use it for its intended purpose.
Comparing Hammer Applications in Concrete Projects
To further illustrate the nuanced uses of different hammers, let’s consider a comparative scenario.
Scenario: Patio Repair Project
Imagine you need to repair a section of your existing concrete patio. The process might involve:
- Breaking out the damaged section: This requires a sledgehammer to break the bulk of the concrete and a ball-peen hammer with a chisel for precise edge work to prepare the area for patching.
- Removing old rebar: If rebar is exposed, a hammer and chisel are used to break around it for clearance.
- Forming the patch: Wooden forms will be needed. A claw hammer is used to nail the form boards together, and a rubber mallet might be used to tap them into final position.
- Curing and finishing: After the patch is poured and leveled, a rubber mallet might be used to tap the forms to help settle the concrete, and a masonry hammer with a small chisel could be used for minor edge adjustments after partial curing.
Table: Hammer Tasks in a Patio Repair Scenario
| Stage of Repair | Hammer Type Used | Specific Task |
| :——————— | :—————– | :————————————————————- |
| Demolition | Sledgehammer | Breaking large sections of damaged concrete |
| Demolition/Edging | Ball-Peen Hammer | Chipping away concrete with a chisel to create clean edges |
| Formwork Construction | Claw Hammer | Nailing wooden forms together |
| Formwork Adjustment | Rubber Mallet | Tapping forms into final, flush position |
| Concrete Consolidation | Rubber Mallet | Tapping forms to settle wet concrete and release air bubbles |
| Finishing/Refinement | Masonry Hammer | Chipping away minor imperfections on cured concrete edges |
Pros and Cons of Using Hammers in Concrete Work
While hammers are valuable, their use also comes with considerations.
Pros
- Versatility: Different hammers can handle a wide range of tasks, from heavy demolition to delicate chipping.
- Efficiency for Demolition: Sledgehammers and chisels are highly effective for breaking up concrete quickly.
- Precision: Ball-peen and masonry hammers, when used with chisels, allow for controlled shaping and repair.
- Accessibility: Hammers are common tools found in most DIY toolkits.
- Cost-Effective: Compared to specialized demolition equipment, hammers are an affordable solution for smaller jobs.
Cons
- Physical Exertion: Using hammers, especially sledgehammers, requires significant physical effort and can be tiring.
- Potential for Damage: Improper use or the wrong type of hammer can easily damage concrete surfaces or formwork.
- Noise and Vibration: Hammering, particularly concrete breaking, can be very noisy and generate considerable vibration.
- Safety Risks: Without proper safety gear and technique, hammers pose risks of injury.
- Limited for Large-Scale Work: For extensive concrete demolition or shaping, heavier machinery or specialized power tools are often more efficient.
Conclusion: Mastering Your Concrete Projects with the Right Hammer
The hammer, often taken for granted, is a surprisingly vital tool for the DIY concrete enthusiast. From the initial demolition and preparation of formwork to the final touches of repair and refinement, understanding which hammer to use and how to use it safely and effectively can make the difference between a mediocre outcome and a professional-looking finish. By equipping yourself with the right hammers and adhering to safety best practices, you can confidently tackle a variety of concrete projects, turning what might seem like an insurmountable task into a rewarding DIY achievement. Remember, even the mightiest concrete structures are often built with the help of the most fundamental tools.
html
<h2>Key Facts/Comparison: Hammers for DIY Concrete Projects</h2>
<table>
  <thead>
    <tr>
      <th>Hammer Type</th>
      <th>Primary Use Case</th>
      <th>Weight Range (Typical)</th>
      <th>Head Material</th>
      <th>Impact Force</th>
      <th>Best For</th>
    </tr>
  </thead>
  <tbody>
    <tr>
      <td>Claw Hammer</td>
      <td>Light demolition, nail pulling, general framing</td>
      <td>16-24 oz</td>
      <td>Forged steel</td>
      <td>Moderate</td>
      <td>Small concrete tasks, removing old nails from forms</td>
    </tr>
    <tr>
      <td>Sledgehammer</td>
      <td>Heavy demolition, breaking concrete, driving stakes</td>
      <td>2-10 lbs</td>
      <td>Forged steel</td>
      <td>High</td>
      <td>Breaking up large concrete sections, driving rebar</td>
    </tr>
    <tr>
      <td>Mason's Hammer / Brick Hammer</td>
      <td>Breaking bricks, shaping stone, scoring concrete</td>
      <td>16-30 oz</td>
      <td>Forged steel (often with a chisel edge)</td>
      <td>Moderate to High</td>
      <td>Cutting or breaking concrete blocks, scoring lines for cuts</td>
    </tr>
    <tr>
      <td>Demolition Hammer (Handheld Electric)</td>
      <td>Breaking concrete, chiseling, tile removal</td>
      <td>Varies (tool weight)</td>
      <td>Hardened steel chisel/bit</td>
      <td>Very High (powered)</td>
      <td>Breaking up concrete slabs, foundations, removing stubborn tiles</td>
    </tr>
  </tbody>
</table>

<h2>Steps/Pros-Cons: Hammering for DIY Concrete Projects</h2>

<h3>General Hammering for Concrete (Breaking/Demolition)</h3>
<table>
  <thead>
    <tr>
      <th>Step/Aspect</th>
      <th>Description</th>
      <th>Pros</th>
      <th>Cons</th>
    </tr>
  </thead>
  <tbody>
    <tr>
      <td>Safety Gear</td>
      <td>Always wear safety glasses, gloves, and sturdy footwear.</td>
      <td>Prevents injury from flying debris.</td>
      <td>Can be slightly restrictive.</td>
    </tr>
    <tr>
      <td>Choosing the Right Hammer</td>
      <td>Select a hammer appropriate for the task's scale.</td>
      <td>Efficient and effective work.</td>
      <td>Using the wrong hammer can be inefficient or cause damage.</td>
    </tr>
    <tr>
      <td>Technique (Sledgehammer)</td>
      <td>Use a swinging motion with your body, not just your arms. Aim for controlled, powerful strikes.</td>
      <td>Maximizes impact force and reduces strain.</td>
      <td>Requires space and can be physically demanding.</td>
    </tr>
    <tr>
      <td>Technique (Mason's Hammer)</td>
      <td>Use glancing blows to score or chip away at concrete edges.</td>
      <td>Allows for more precise shaping and breaking.</td>
      <td>Slower for large-scale demolition.</td>
    </tr>
    <tr>
      <td>Breaking Concrete Sections</td>
      <td>Start by creating a crack, then work outwards. Focus strikes on existing fractures.</td>
      <td>Makes breaking larger sections easier.</td>
      <td>Can create uneven breaks if not done carefully.</td>
    </tr>
    <tr>
      <td>Cleanup</td>
      <td>Clear away debris regularly during the process.</td>
      <td>Prevents tripping hazards and makes progress visible.</td>
      <td>Adds to the overall time.</td>
    </tr>
    <tr>
      <td>Noise Level</td>
      <td>Hammering concrete is inherently noisy.</td>
      <td>N/A</td>
      <td>Requires hearing protection and consideration for neighbors.</td>
    </tr>
  </tbody>
</table>