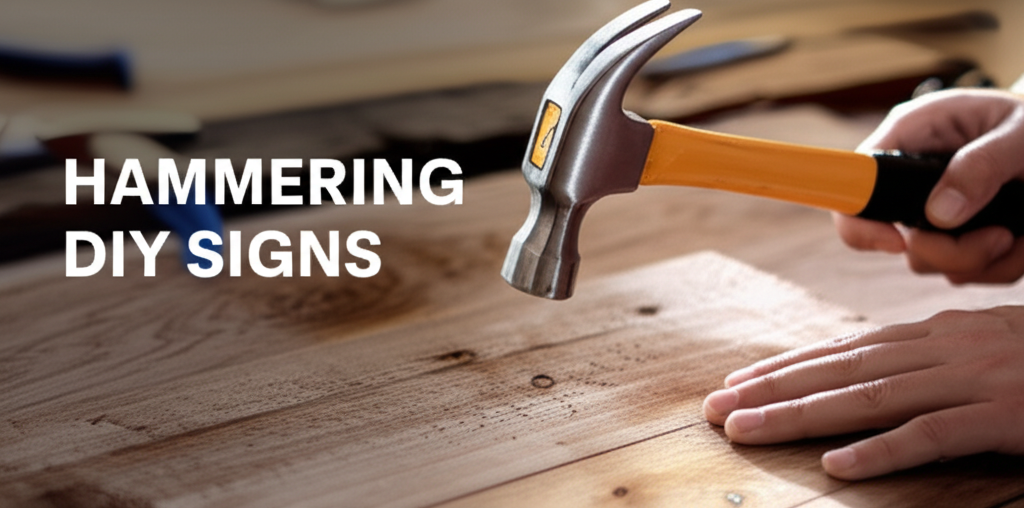
Introduction: The Art of the Hammer in DIY Sign Making
Creating your own signs can be a rewarding DIY project, offering a personal touch and cost savings. While design and materials are crucial, the humble hammer is often the unsung hero of sign assembly. Mastering hammering techniques ensures your signs are not only visually appealing but also durable and securely fastened. Whether you’re attaching wooden letters, metal brackets, or decorative elements, understanding how to wield your hammer correctly is paramount. This guide will delve into essential hammering techniques, from selecting the right hammer to executing precise strikes for professional-looking results.
Must-Have Tools in Your House If You Work Regularly


Choosing the Right Hammer for Your DIY Sign Project

The effectiveness of your hammering hinges on selecting the appropriate tool for the job. Different types of hammers are designed for specific tasks, and using the wrong one can lead to inefficiency, damage, or even injury.
Common Hammer Types for DIY Sign Making
- Claw Hammer: The most ubiquitous hammer, featuring a flat striking face and a claw for removing nails. Ideal for general woodworking and attaching components with nails.
- Ball-Peen Hammer: Characterized by one rounded (peen) face and one flat face. The rounded peen is used for shaping metal and riveting, making it suitable for metal signs or attaching metal hardware.
- Mallet: Made from rubber, wood, or plastic, mallets deliver a softer blow. They are excellent for tapping delicate materials into place without causing damage, such as fitting wooden dowels or assembling parts that require gentle persuasion.
- Tack Hammer: A lighter hammer with a magnetic tip designed to hold small tacks. Perfect for attaching fabric, thin materials, or small decorative elements where precision is key.
Factors to Consider When Selecting a Hammer
- Weight: A heavier hammer delivers more force, but can be fatiguing. A lighter hammer offers more control. Choose based on the size of the fasteners and the material you’re working with.
- Head Material: Steel is common for most hammers. For delicate work, consider softer materials like rubber or plastic.
- Handle Material: Wood offers shock absorption, fiberglass provides durability and vibration reduction, and steel is the strongest but can transmit more vibration.
- Grip: A comfortable, non-slip grip is essential for control and reducing fatigue.
Key Hammering Techniques for Precision and Control
Proper technique is as important as the right tool. Even with the best hammer, incorrect form can lead to bent nails, damaged materials, and uneven results.
The Fundamentals of Striking
- Grip: Hold the hammer towards the end of the handle for maximum leverage and power. For more delicate control, grip closer to the head.
- Stance: Stand with your feet shoulder-width apart, balanced, and facing your work. This provides stability.
- Swing: The swing should originate from the elbow and shoulder, not just the wrist. Keep your eye on the nail head.
- Impact: Aim to strike the nail head squarely with the center of the hammer face. A glancing blow will bend the nail.
Starting a Nail
The initial strike is critical for setting the nail straight.
- Position the Nail: Hold the nail vertically against the material where you want it to go.
- Light Tap: Use a very light tap with the hammer to set the nail’s base and hold it in place. You can also use a nail holder or pliers for added safety and accuracy, especially with smaller nails.
- Remove Your Fingers: Once the nail is stable, remove your fingers from the vicinity of the strike zone.
- First Firm Strike: Drive the nail in with a firm, controlled swing, ensuring the hammer strikes the nail head squarely.
Driving a Nail Straight
Maintaining a straight trajectory for the nail is essential for structural integrity and aesthetics.
- Eye on the Prize: Keep your eyes focused on the nail head throughout the swing.
- Square Strikes: Every swing should connect the hammer face squarely with the nail head.
- Consistent Swing: Develop a consistent swing rhythm. Don’t rush the process.
- Nail Angle: If you need to drive a nail at an angle, ensure the nail itself is angled correctly from the start and adjust your hammer strike accordingly.
Dealing with Stubborn or Bent Nails
Mistakes happen, but knowing how to fix them is part of mastering the technique.
- Minor Bends: For slight bends, try to straighten the nail with a quick, firm strike on the side of the nail head, using the claw to provide counter-leverage if necessary.
- Significant Bends: If a nail is badly bent, it’s often best to remove it and start again with a new nail. Use the claw end of the hammer to gently pry the nail out. Place a scrap piece of wood under the claw to protect the surface of your sign.
- Stubborn Nails: If a nail is difficult to drive, ensure you are hitting it squarely and with sufficient force. If it’s still not going in, you may need to use a nail set to drive it flush or slightly below the surface.
Using a Nail Set for Flush or Recessed Fastening
For a polished finish, especially in woodworking, a nail set is an invaluable tool.
What is a Nail Set?
A nail set is a metal rod with a pointed or cupped tip, designed to drive nails slightly below the surface of the material without damaging the surrounding wood.
How to Use a Nail Set
- Position the Nail Set: Place the tip of the nail set onto the head of the fully driven nail.
- Hold Firmly: Grip the nail set firmly with your non-dominant hand, keeping your fingers clear of the striking area.
- Controlled Strikes: Use a hammer with a moderate swing to strike the top of the nail set. Start with light taps and increase force as needed.
- Monitor Depth: Watch closely to ensure you don’t drive the nail set too deep, which could create an unsightly hole.
- Countersinking: For a truly flush finish, you can use a nail set to slightly countersink the nail heads.
Hammering Techniques for Specific DIY Sign Materials
Different materials require slightly different approaches to hammering.
Wood Sign Materials
- Softwoods (Pine, Cedar): These are forgiving. Use a standard claw hammer. Be mindful of over-striking, which can dent the wood. A nail set is excellent for a clean finish.
- Hardwoods (Oak, Maple): Require more force. Ensure your nails are sharp and straight. Pre-drilling pilot holes can prevent splitting, especially near edges.
- Plywood/MDF: Drive fasteners straight to avoid delamination or chipping. Use smaller gauge nails or screws for better hold.
Metal Sign Materials
- Sheet Metal: Use a lighter hammer, possibly a ball-peen hammer, and drive rivets or small nails with care. You might need to pre-drill holes for fasteners. Soft blows are key to avoid deforming the metal.
- Aluminum: Softer than steel, aluminum can be easily dented. Use lighter hammers and aim for precision.
- Steel: Requires more robust hammering. A ball-peen hammer is often suitable for riveting. For nails, ensure they are hardened.
Other Materials
- Plastic/Acrylic: These materials can crack easily. Avoid hammering directly if possible. If necessary, use a tack hammer or a rubber mallet with very gentle taps, or pre-drill small pilot holes.
- Composite Materials: Treat similar to hardwoods, but be aware of their specific composition. Pre-drilling is often recommended.
Safety First: Essential Precautions When Hammering
Hammering, while seemingly simple, carries inherent risks if proper safety measures are not observed.
Personal Protective Equipment (PPE)
- Safety Glasses: Absolutely essential to protect your eyes from flying debris, nail fragments, or hammer chips.
- Work Gloves: Protect your hands from splinters, blisters, and minor impacts.
- Sturdy Footwear: Protect your feet from dropped tools or materials.
Workshop Safety Practices
- Clear Workspace: Ensure your work area is free of clutter and tripping hazards.
- Secure Workpiece: Clamp down your sign material or workpiece firmly to prevent it from shifting during hammering.
- Awareness of Surroundings: Be mindful of where others are in relation to your hammering.
- Proper Tool Maintenance: Regularly inspect your hammer for a loose head or damaged handle.
Troubleshooting Common Hammering Issues
Even experienced DIYers encounter problems. Here’s how to address common hammering woes.
Bent Nails
- Cause: Hitting the nail head at an angle, insufficient force, or hitting a knot in the wood.
- Solution: Remove the nail and start with a new one, ensuring square strikes. For minor bends, try to straighten with a quick, firm tap.
Damaged Material Surface
- Cause: Hammer glancing off the nail, over-striking, or using the wrong hammer type.
- Solution: Use a nail set for a cleaner finish. If the damage is minor, it might be acceptable. For significant dents, consider sanding or filling.
Splitting Wood
- Cause: Hammering too close to the edge of the wood, using nails that are too thick, or not pre-drilling.
- Solution: Pre-drill pilot holes, especially for hardwoods or near edges. Use appropriately sized nails.
Hammer Slipping
- Cause: Wet or oily hands, worn grip on the hammer, or improper grip.
- Solution: Ensure hands are clean and dry. Check the hammer’s grip. Hold the hammer towards the end of the handle for better control.
Comparing Hammering Techniques and Tools
Understanding the nuances of different approaches can help you choose the best method for your specific sign-making task.
| Technique/Tool | Best For | Pros | Cons | Material Suitability |
|---|---|---|---|---|
| Standard Claw Hammer (Nail Driving) | General assembly, attaching wooden components | Versatile, effective for most nails | Can damage wood if not careful, not ideal for delicate materials | Wood, soft metals (with care) |
| Ball-Peen Hammer (Riveting/Shaping) | Metalwork, securing metal components | Good for shaping and setting rivets | Can mar surfaces if not used with care | Metal (steel, aluminum) |
| Mallet (Tapping/Assembly) | Gentle persuasion, assembling delicate parts | Prevents damage to materials | Limited force, not for driving nails | Wood, plastic, composites |
| Tack Hammer (Small Fasteners) | Attaching fabric, small decorative elements | Precise, magnetic tip holds small fasteners | Limited to small fasteners, not for structural work | Fabric, thin wood, delicate materials |
| Nail Set (Countersinking) | Flush or recessed nail heads | Professional finish, prevents snagging | Requires an additional tool and careful execution | Wood, soft metals |
Step-by-Step Guide: Attaching Wooden Letters to a Sign Backer
This common DIY sign task illustrates many of the techniques discussed.
Materials Needed:
- Wooden letters
- Sign backer (e.g., plywood, MDF)
- Small finishing nails or brad nails
- Hammer (claw hammer or tack hammer)
- Pencil
- Ruler or measuring tape
- Optional: Nail set, wood glue, clamps
Steps:
- Layout: Position the wooden letters on the sign backer exactly as you want them. Use a pencil to lightly mark their placement.
- Pre-drilling (Optional but Recommended): For softer woods or if you’re concerned about splitting, pre-drill small pilot holes through the base of the wooden letter and into the backer. Ensure the drill bit is slightly smaller than the nail diameter.
- Apply Glue (Optional): For extra strength, apply a thin bead of wood glue to the back of each letter before attaching.
- Secure First Letter: Place the first letter in its marked position. Hold it firmly.
- Start the Nail: Using a tack hammer or your claw hammer with a light touch, tap a finishing nail through the base of the wooden letter and into the backer. Hold the nail upright.
- Drive the Nail: Once the nail is stable, remove your fingers and drive the nail with controlled swings. Aim for two nails per letter, spaced for stability, or as needed for larger letters.
- Countersink (Optional): If desired, use a nail set to gently tap the nail heads slightly below the surface of the wooden letter.
- Repeat: Continue this process for all letters, ensuring each is securely fastened and straight.
- Clean Up: Wipe away any excess glue immediately.
Pros and Cons of Hammer-Based Fastening for DIY Signs
While effective, hammer-based fastening has its advantages and disadvantages.
| Pros | Cons |
|---|---|
| Speed: Nails can often be driven faster than screws. | Potential for Damage: Hammer strikes can mar or split materials if not careful. |
| Cost-Effective: Nails are generally cheaper than screws. | Less Reversible: Removing nails can be more damaging than removing screws. |
| Simplicity: Requires only a hammer and fasteners. | Skill Dependent: Requires practice for precision and avoiding mistakes. |
| Strong Hold: Properly driven nails provide a very secure mechanical bond. | Limited Adjustability: Difficult to reposition once driven. |
| Aesthetic Options: Can be used for visible decorative nailing or hidden fastening. | Requires Access: Need clear access to drive the nail effectively. |
Conclusion: Mastering the Hammer for Professional DIY Signs
The hammer is a fundamental tool in the DIY sign maker’s arsenal. By understanding the different types of hammers, mastering proper striking techniques, and prioritizing safety, you can achieve professional-quality results. From the initial tap that sets the nail to the final gentle persuasion with a nail set, each step contributes to a durable, attractive, and well-crafted sign. Practice these techniques on scrap materials before tackling your main project, and you’ll be well on your way to hammering your way to sign-making success. Remember, a steady hand, a clear eye, and the right approach can transform simple materials into eye-catching signage.