
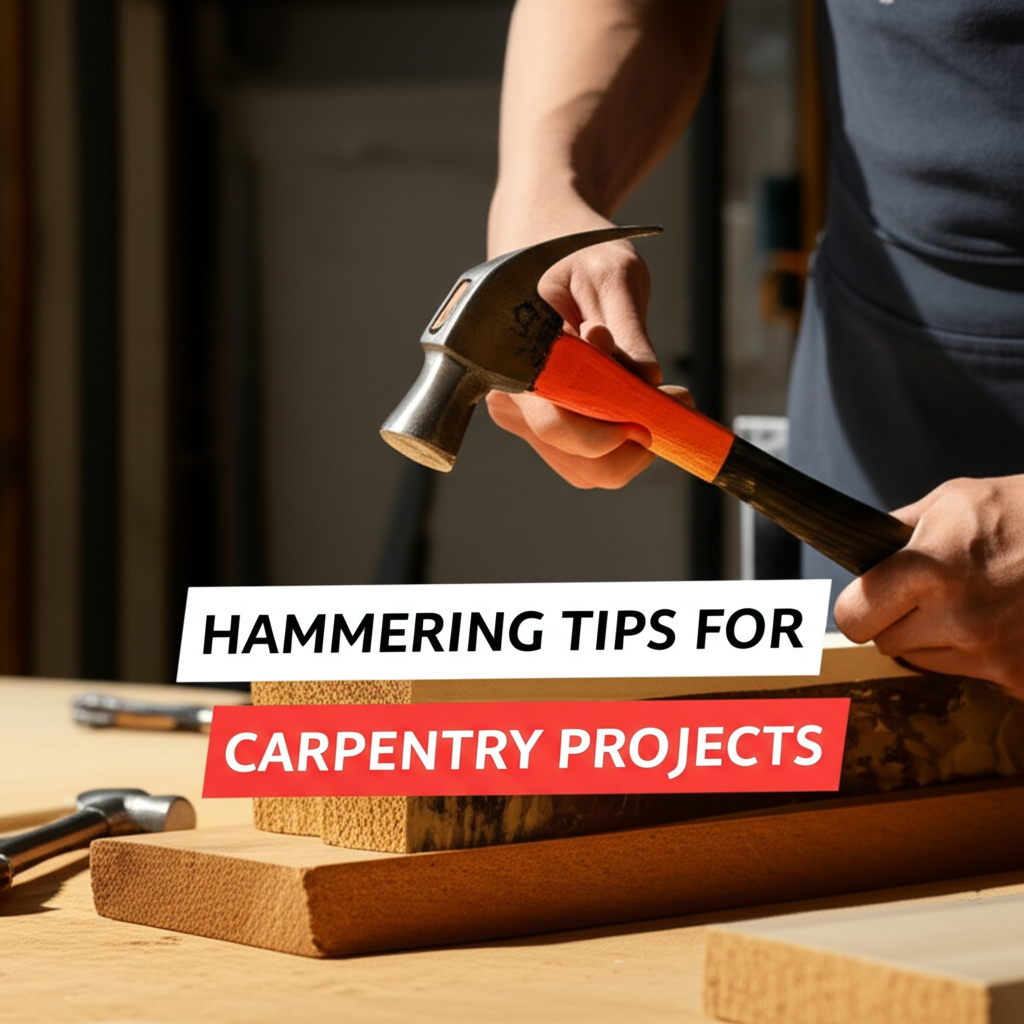
The Humble Hammer: More Than Just a Striking Tool
The hammer is arguably the most fundamental tool in any carpenter’s arsenal. Its seemingly simple design belies its versatility and the nuanced techniques that elevate its use from mere blunt force to precise craftsmanship. Whether you’re driving a nail, breaking apart wood, or shaping metal, understanding the hammer and its proper application is crucial for efficiency, safety, and the quality of your work. This guide delves into the essential hammering tips that will transform your approach to carpentry projects, from the most basic tasks to more intricate endeavors.
Must-Have Tools in Your House If You Work Regularly


Choosing the Right Hammer
The first step to effective hammering is selecting the correct hammer for the job. Different tasks demand different hammer types, each designed with specific weight, head shape, and handle material in mind. Using the wrong hammer can lead to inefficiency, damage to your workpiece, or even injury.
Common Hammer Types and Their Uses
- Claw Hammer: The most ubiquitous hammer, featuring a flat striking face on one side and a curved, forked claw on the other for nail removal. Ideal for general carpentry, framing, and demolition.
- Ball-Peen Hammer: Characterized by a rounded (peened) face on one side of the head, used for shaping metal, rounding rivets, and metalworking.
- Framing Hammer: Heavier than a claw hammer, designed for driving larger nails in framing construction. Often features a milled (waffled) face to prevent the hammer from slipping off nail heads.
- Sledgehammer: A heavy, two-handed hammer used for demolition, driving stakes, and striking chisels or punches.
- Mallet: Typically made of wood, rubber, or plastic, mallets are used to strike chisels or to assemble delicate joinery without damaging the wood.
- Tack Hammer: A lightweight hammer with a magnetic head, designed for driving small tacks and finishing nails.
- Drywall Hammer: Features a flat striking face and a cutting edge on the side for trimming drywall.
Hammer Weight and Balance
The weight of a hammer is a critical factor. A heavier hammer will drive nails with fewer swings, but it can also cause fatigue and reduce control. Lighter hammers offer more precision but require more effort. The balance of the hammer, where the center of gravity lies, significantly impacts its swing and control. A well-balanced hammer feels natural in your hand, allowing for a smooth and efficient swing.
Handle Material: Wood, Fiberglass, and Steel
- Wood (Hickory): Traditional and provides good shock absorption, but can be prone to breaking if mishandled or if moisture content changes.
- Fiberglass: Durable, offers good vibration dampening, and is less susceptible to breaking than wood.
- Steel: The most durable, but can transmit more shock to the user’s arm and hand. Often features a rubber grip for comfort.
The Anatomy of a Hammer Swing
A proper hammer swing is a fluid motion that utilizes the momentum of the hammerhead for maximum impact with minimal effort. It’s not just about brute strength; it’s about technique and control.
Grip
Your grip on the hammer handle is paramount. For most nailing tasks, a relaxed grip towards the end of the handle provides the longest lever arm, generating the most power and allowing for a natural arc. For more delicate tasks or when precision is key, a closer grip offers greater control. Avoid a death grip, as this will lead to fatigue and reduced dexterity.
Stance and Body Positioning
A stable stance is essential for a controlled swing. Stand with your feet shoulder-width apart, knees slightly bent, and face your workpiece. The swing should originate from your shoulder, with your elbow and wrist working in concert. Keep your eye on the nail head throughout the swing.
The Swing Motion
- Backswing: Raise the hammer smoothly, keeping your eye on the nail head. The arc of the swing should be controlled, not wild.
- Downswing: Accelerate the hammerhead towards the nail. The power comes from the acceleration, not just the weight of the hammer.
- Impact: Strike the nail head squarely. The impact should feel like a controlled thud, not a jarring shock.
- Follow-through: Continue the swing naturally after impact. This helps maintain momentum and prevents abrupt stops that can lead to fatigue or loss of control.
Nailing Techniques: Driving Nails with Precision
Driving nails is the most common use of a hammer. Mastering this basic skill is the foundation of many carpentry projects.
Starting the Nail
The most challenging part for beginners is often getting the nail to stand on its own.
- The Pinch Grip: Hold the nail between your thumb and forefinger.
- Initial Tap: Lightly tap the nail head a couple of times to set it in place.
- Releasing the Nail: Once the nail is standing on its own, slowly pull your fingers away. For very small nails, consider using nail holders or pliers to avoid injury.
Driving the Nail
- Square Strikes: Aim to strike the nail head squarely. A glancing blow can bend the nail or damage the wood.
- Consistent Force: Apply consistent force with each swing, gradually increasing power as the nail penetrates.
- Nail Alignment: Ensure the nail is driven straight into the wood. If it starts to bend, stop and carefully back it out using the claw.
Setting the Nail
Once the nail head is flush with the surface of the wood, you may need to “set” it. This involves sinking the nail head slightly below the surface to prevent it from snagging fabric or being visible in painted surfaces. Use a nail set and a few sharp taps to drive the nail head in, being careful not to over-strike and split the wood.
Removing Nails: The Claw’s Advantage
The claw of a hammer is designed for nail removal. Proper technique ensures you can extract nails cleanly without damaging the wood.
Leverage is Key
Slide the claw under the nail head. Place a scrap piece of wood or a thin shim under the hammer’s head to create more leverage and protect the surface of your workpiece.
Pry and Pull
Gently rock the hammer back, using the fulcrum you created. For stubborn nails, you may need to reposition the hammer and apply more leverage. If the nail is deeply embedded, you might need to use the hammer face to tap the claw further under the nail head.
Troubleshooting Common Hammering Problems
Even experienced carpenters encounter issues. Knowing how to address them efficiently is part of the skill.
Bent Nails
If a nail bends significantly, don’t try to force it straight. Back it out with the claw and start a new nail. Attempting to drive a bent nail will likely result in a weak joint and further damage to the wood.
Splitting Wood
Wood can split, especially near the end grain or when driving nails close together.
- Pre-drilling: For hardwoods or when nailing near edges, pre-drilling a pilot hole slightly smaller than the nail shank can prevent splitting.
- Nail Size: Use the appropriate nail size for the thickness of the wood.
- Nail Spacing: Avoid driving nails too close to the edge or to each other.
Damaged Nail Heads
If the nail head is mushroomed or deformed, it becomes difficult to strike accurately. Use a nail set to try and reshape the head slightly or back out the nail and use a new one.
Safety First: Hammering with Caution
Hammering, like any power tool operation, carries inherent risks. Prioritizing safety will prevent injuries and ensure you can continue your projects.
Eye Protection
Always wear safety glasses or goggles. Flying nail fragments, wood chips, or even a glancing hammer blow can cause severe eye damage.
Secure Workpiece
Ensure your workpiece is securely clamped or supported. A wobbling piece can cause inaccurate strikes and potential injury.
Clear Work Area
Keep your work area free of debris, obstructions, and tripping hazards.
Awareness of Surroundings
Be mindful of other people working nearby. Ensure they are also wearing appropriate safety gear.
Proper Hammer Maintenance
Regularly inspect your hammer for any damage to the head or handle. A loose head or a cracked handle is a significant safety hazard.
Advanced Hammering Techniques
Beyond basic nailing, mastering advanced techniques can enhance your carpentry skills.
Using a Nail Set
As mentioned earlier, a nail set is crucial for sinking finishing nails below the wood surface. This allows for a cleaner aesthetic, especially when painting or staining.
Using a Nail Holder
For small or awkward nails, a magnetic or mechanical nail holder keeps your fingers safely away from the hammer’s path, especially during the initial tap.
Demolition and Disassembly
When taking things apart, the hammer becomes a tool for controlled destruction. Use the claw for pulling nails and the hammer face or side for carefully prying apart joints. A small sledgehammer can be used for breaking up larger pieces of wood or other materials.
Hammering for Different Materials
While wood is the primary material for most carpentry projects involving hammers, understanding how to hammer different materials is also beneficial.
Driving Screws (with a Hammer?)
While not ideal, in a pinch, a hammer can be used to drive screws by tapping the screwdriver handle. However, this can damage the screw head and the screwdriver itself. A proper screwdriver or drill is always recommended.
Metalwork
As mentioned, ball-peen hammers are essential for metalworking tasks like shaping metal, riveting, and striking punches. The technique here involves controlled, rhythmic strikes to achieve the desired deformation.
Table 1: Key Hammer Facts and Comparisons
| Hammer Type | Primary Use | Head Shape | Typical Weight (oz) | Common Handle Material |
| :————— | :—————————————- | :——————————————- | :—————— | :——————— |
| Claw Hammer | General carpentry, nail removal | Flat face, curved claw | 16-24 | Wood, Fiberglass |
| Framing Hammer | Framing, driving large nails | Milled or flat face, straight claw (sometimes) | 20-32 | Wood, Fiberglass |
| Ball-Peen Hammer | Metalworking, shaping, riveting | Flat face, rounded peen | 8-32 | Wood, Fiberglass, Steel |
| Sledgehammer | Demolition, driving stakes, striking chisels | Large, flat face | 2-10 lbs | Wood, Fiberglass, Steel |
| Tack Hammer | Driving small tacks and finishing nails | Small flat face, magnetic tip | 2-6 | Wood, Fiberglass |
Table 2: Hammering Steps, Pros, and Cons
| Task/Technique | Steps | Pros | Cons |
| :——————– | :————————————————————————————————————————————————————————————————————————————————————————————————– | :—————————————————————————————————– | :——————————————————————————————————— |
| Driving a Nail | 1. Select appropriate hammer and nail.
2. Grip nail securely, tap to set.
3. Release nail.
4. Swing hammer from shoulder, striking nail head squarely.
5. Follow through with swing.
6. Set nail if necessary. | Efficient joining of materials, relatively quick. | Risk of bent nails, wood splitting, potential for missed strikes causing injury or damage. |
| Removing a Nail | 1. Slide claw under nail head.
2. Use scrap wood as fulcrum.
3. Pry back gently.
4. Reposition for more leverage if needed. | Effective extraction of nails, can be done with minimal damage to wood if done correctly. | Can damage wood surface if no fulcrum is used, can be difficult with deeply embedded or rusted nails. |
| Using a Nail Set | 1. Position nail head flush or slightly proud.
2. Place nail set over nail head.
3. Strike nail set squarely with hammer.
4. Repeat for desired depth. | Sinks nail heads below the surface for a clean finish, essential for visible joinery. | Risk of over-striking and splitting wood, requires a second tool (hammer) to operate. |
| Using a Nail Holder | 1. Place nail in holder.
2. Hold holder with nail against workpiece.
3. Tap nail head with hammer to set it.
4. Remove holder. | Protects fingers from hammer strikes, improves safety and control for small nails. | Adds an extra tool to manage, may not be effective with all nail types or tight spaces. |
| Ball-Peen Shaping | 1. Secure metal workpiece.
2. Use correct ball-peen hammer.
3. Strike metal with the peened end in controlled, overlapping blows.
4. Rotate workpiece to achieve desired shape. | Effective for forming, rounding, and shaping metal. | Requires practice to achieve smooth results, can deform metal if too much force is applied. |
Maintaining Your Hammer
A well-maintained hammer will last a lifetime and perform at its best.
- Cleanliness: Keep the hammer head clean and free from rust. A wire brush can remove surface rust.
- Head Security: Ensure the hammer head is securely fastened to the handle. If it’s a wooden handle, check the wedge.
- Handle Integrity: Inspect wooden handles for cracks or splits. Replace damaged handles immediately.
- Grip: If the handle grip is worn, consider replacing it or wrapping it with grip tape.
Conclusion: The Art of the Strike
The hammer is a testament to the principle that even the simplest tools, when wielded with knowledge and skill, can produce remarkable results. By understanding the different types of hammers, mastering the swing, employing proper nailing and removal techniques, and prioritizing safety, you can elevate your carpentry projects. The “art of the strike” isn’t just about hitting something; it’s about controlled power, precision, and a deep respect for the material you’re working with. So, pick up your hammer, apply these tips, and build with confidence.
“`html