Building a functional and durable storage box is a rewarding woodworking project, and surprisingly, it’s achievable with a surprisingly simple toolset. While power tools offer speed and precision, mastering the fundamentals with a hammer can teach you invaluable lessons about material selection, joinery, and the satisfaction of hands-on creation. This guide will walk you through the process of constructing a robust storage box using primarily a hammer and nails, suitable for everything from organizing tools in the garage to storing seasonal decorations.
Must-Have Tools in Your House If You Work Regularly


Why Build a Storage Box with a Hammer?
In an age of advanced power tools, the question arises: why opt for a hammer-centric approach? The answer lies in accessibility, cost-effectiveness, and the fundamental skills it imparts. Not everyone has access to a sophisticated workshop, and the cost of power tools can be prohibitive for beginners. Furthermore, relying on a hammer forces a deeper understanding of joinery and the tactile properties of wood. It’s a foundational skill that, once mastered, can be applied to a myriad of other projects.
Benefits of Hammer-Built Projects
- Accessibility: A hammer is one of the most common and affordable tools available.
- Cost-Effectiveness: Minimizes the need for expensive power equipment.
- Skill Development: Fosters a hands-on understanding of woodworking principles.
- Durability: With proper technique, hammer-joined boxes can be incredibly strong.
- Satisfaction: The sense of accomplishment from creating something with basic tools is immense.
Essential Tools and Materials
Before you begin, gathering the right tools and materials is crucial for a successful build. While a hammer is the star, a few other supporting players will make the job much easier and the result more professional.
Tools You’ll Need:
- Hammer: A claw hammer is ideal, offering the ability to drive nails and remove them if mistakes are made. A medium weight (around 16-20 oz) is a good balance for most tasks.
- Measuring Tape: For accurate dimensioning of your wood.
- Pencil: For marking cut lines and assembly points.
- Hand Saw: A crosscut saw is suitable for cutting lumber to length.
- Clamps: Bar clamps, C-clamps, or strap clamps are invaluable for holding pieces together while nailing.
- Safety Glasses: Always wear safety glasses when hammering to protect your eyes from flying debris.
- Work Gloves: To protect your hands from splinters and reduce fatigue.
- Optional: Square: A combination square or speed square can help ensure 90-degree angles for cleaner cuts and assembly.
- Optional: Nail Set: To recess the nail heads slightly below the wood surface for a cleaner finish.
Materials:
- Lumber: For a sturdy box, 1×6 or 1×8 pine or fir boards are excellent choices. These are readily available at most lumberyards and home improvement stores. The thickness (¾ inch) provides good strength.
- Nails: Common nails or box nails in lengths appropriate for your lumber thickness are needed. For ¾ inch lumber, 1½ inch or 2 inch nails are typically suitable.
- Sandpaper: Medium-grit (e.g., 120) and fine-grit (e.g., 220) sandpaper for smoothing edges and surfaces.
- Optional: Wood Glue: For added strength at the joints, wood glue is highly recommended.
Key Facts and Comparison
Understanding the properties of different wood types and nail sizes can significantly impact the durability and appearance of your storage box.
| Material/Tool | Description | Pros | Cons |
|---|---|---|---|
| Pine Lumber | Softwood, lightweight, easy to work with. | Affordable, readily available, easy to cut and nail. | Prone to dents and scratches, less durable for heavy-duty use. |
| Fir Lumber | Stronger softwood, more durable than pine. | Good balance of strength and workability, reasonably priced. | Slightly harder to work than pine, can have more knots. |
| Common Nails | Thicker shank, larger head. | High holding power, good for structural joints. | Can split wood if not pre-drilled, larger head is more visible. |
| Box Nails | Thinner shank, smaller head. | Less likely to split wood, cleaner appearance. | Slightly less holding power than common nails. |
| Wood Glue | Adhesive that bonds wood fibers. | Significantly increases joint strength, seals gaps. | Requires clamping, adds a step to the process. |
Planning Your Storage Box Design
Before you cut any wood, it’s essential to have a clear plan. The size and dimensions of your box will depend on its intended use. For this guide, we’ll focus on building a straightforward rectangular box.
Determining Dimensions
Let’s assume you want to build a box approximately 24 inches long, 12 inches wide, and 12 inches high. This is a versatile size.
- Length: 24 inches
- Width: 12 inches
- Height: 12 inches
Cutting List (using 1×6 lumber – actual width is 5.5 inches):
Since we’re using 1×6 lumber (¾ inch thick), the actual external width will be the width of two boards plus the thickness of the side boards.
- Two (2) Side Panels: 24 inches long x 12 inches high. (When assembled, the ends will overlap the front/back panels).
- Two (2) End Panels: 10.5 inches long x 12 inches high. (This accounts for the ¾ inch thickness of the two side panels, ensuring an overall width of 12 inches).
- Two (2) Bottom Panels: 22.5 inches long x 5.5 inches wide (to fit inside the side and end panels).
Important Note: If you are using 1×8 lumber (actual width 7.25 inches), you would adjust the height of your side and end panels accordingly, and the bottom panels would be cut to fit inside the assembled sides and ends. For simplicity, this guide will stick with 1×6.
Step-by-Step Construction Guide
With your plan and materials in hand, it’s time to start building. Patience and precision are key.
Step 1: Measure and Mark Your Lumber
Using your measuring tape and pencil, carefully mark the dimensions for each piece of your storage box onto the lumber. Accuracy here will prevent headaches later. If you have a square, ensure your lines are perpendicular to the edge of the board.
Step 2: Cut the Lumber
Secure your lumber with clamps to a stable surface. Using your hand saw, carefully cut along the marked lines. Take your time and saw with a steady, controlled motion. Aim for straight, clean cuts.
- Tip: For slightly cleaner cuts, you can score the cut line with the back of a utility knife before sawing.
Step 3: Sand the Cut Edges
After cutting, the edges of your lumber will be rough. Use medium-grit sandpaper to smooth these edges, removing splinters and creating a cleaner surface for assembly.
Step 4: Assemble the Side and End Panels
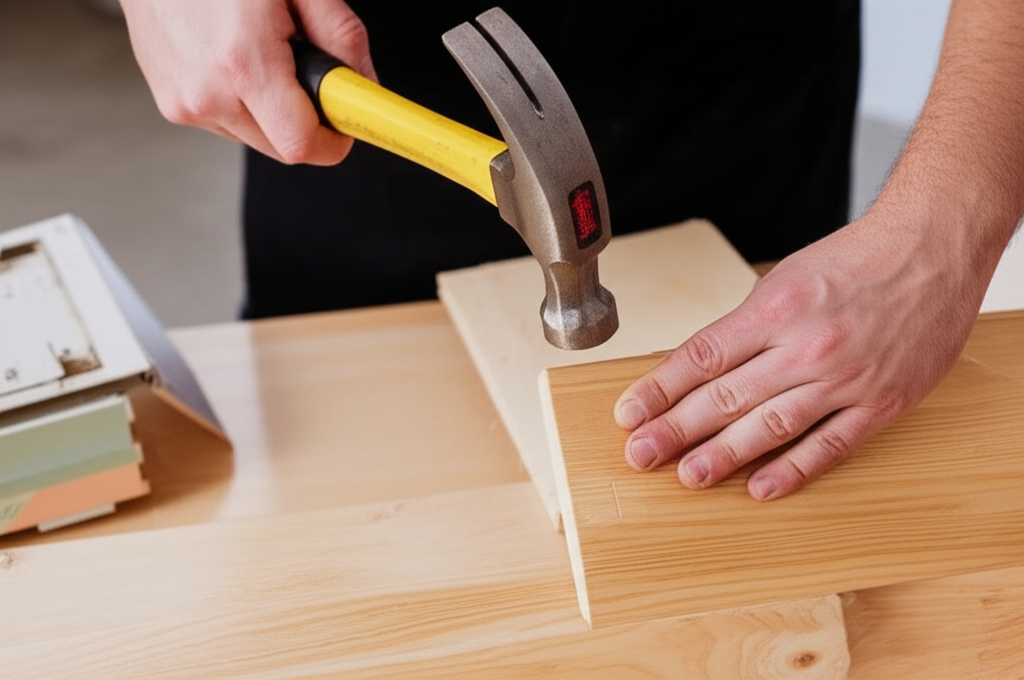
This is where the hammer comes into play. We’ll join the side panels to the end panels to form the rectangular frame of the box.
- Option A: Butt Joints (Simpler): Place one end panel flush against the edge of a side panel. Apply wood glue (if using) to the end grain of the end panel. Hold them firmly together. Drive two to three nails through the side panel into the end panel, spacing them evenly. Repeat for the other side. Then, attach the second side panel to the other ends of the end panels.
- Option B: Overlapping Joints (Stronger): This is what our cutting list is designed for.
1. Take one side panel (24″ x 12″).
2. Take one end panel (10.5″ x 12″). Apply wood glue to the 12-inch edge of the end panel.
3. Position the end panel flush with the end of the side panel, so the end panel’s thickness is butted against the side of the side panel. Clamp them together.
4. Drive two to three 1 ½ inch nails through the side panel into the end panel, about ¾ inch from each edge, and one in the center. Ensure the nails go straight into the end grain of the end panel.
5. Repeat this process for the other end of the side panel, attaching the second end panel.
6. Now, take the second side panel. Apply glue to the exposed 12-inch edges of both end panels.
7. Position the second side panel flush against the ends of the end panels, ensuring the ends of the end panels sit within the sides. Clamp securely.
8. Drive nails through the second side panel into the end panels, mirroring the first side.
Step 5: Attach the Bottom Panels
Once the four walls are assembled and the glue (if used) is setting, it’s time to attach the bottom.
- Lay the assembled box frame on its side.
- Place the two bottom panels (22.5″ x 5.5″) inside the frame, flush with the bottom edges. There should be a small gap between them if you cut them precisely to fit the interior space.
- Apply wood glue to the bottom edges of the side and end panels where the bottom panels will sit.
- Position the bottom panels.
- Drive nails through the side and end panels into the edges of the bottom panels. Use about 3-4 nails per side for each bottom panel. Drive the nails at an angle (toe-nailing) for better holding power.
Step 6: Reinforce and Finish
- Nail Heads: If you have a nail set, gently tap it onto the head of each nail and strike it with the hammer to recess the nail head slightly below the surface of the wood. This provides a cleaner look and makes sanding easier.
- Sanding: Once the glue is fully dry and all nails are set, use medium-grit sandpaper to smooth all surfaces and edges. Pay attention to any rough spots or areas where boards meet. Follow up with fine-grit sandpaper for a smooth finish.
- Optional: Lid: For a closed box, you would cut a piece of plywood or a few boards to create a lid. This can be attached with hinges or simply rest on top.
Pros and Cons of Hammer Construction
Hammer-based joinery, while rewarding, has its own set of advantages and disadvantages compared to more modern techniques.
| Aspect | Pros | Cons |
|---|---|---|
| Joint Strength | Can be very strong when using glue and multiple nails, especially with well-fitting joints. | Susceptible to splitting wood if nails are driven too close to edges or without pre-drilling. Can loosen over time with significant vibration or stress. |
| Aesthetics | Nail heads can give a rustic or traditional look. Recessing nails with a nail set and sanding can create a very clean finish. | Visible nail heads can be unappealing to some. If nails are hammered poorly, they can bend or miss their target, creating unsightly marks. |
| Learning Curve | Relatively low barrier to entry; requires practice to master driving nails straight and true. | Achieving perfectly flush and square joints can be challenging without practice and the aid of clamps and squares. |
| Cost | Extremely cost-effective. The primary tool is inexpensive, and consumables (nails) are cheap. | Can be time-consuming compared to power nailing or screw fastening. |
| Repairability | If a joint loosens, it can often be reinforced with additional nails or by driving them into new spots. | Removing bent or badly driven nails can damage the wood. |
Tips for Success and Avoiding Common Mistakes
Even with a simple tool like a hammer, there are techniques that can elevate your project from functional to impressive.
Hammering Techniques:
- Grip: Hold the hammer towards the end of the handle for maximum leverage and power. For more control, grip closer to the head.
- Starting a Nail: Hold the nail between your thumb and forefinger. Tap the nail head lightly with the hammer to set it in place before removing your fingers.
- Driving a Nail: Swing the hammer from your elbow and shoulder, not just your wrist. Aim to strike the nail head squarely.
- Nailing Near Edges: To prevent splitting, use smaller nails or pre-drill a small pilot hole with a nail (or an awl) before driving the main nail.
- Toe-Nailing: Drive nails at a slight angle into the wood for stronger holding power, especially when attaching the bottom or joining boards at an angle.
- Flush Driving: Ensure the nail head is driven flush with or slightly below the wood surface for a cleaner look.
Common Mistakes to Avoid:
- Underestimating Measuring: Inaccurate measurements lead to ill-fitting pieces and a wobbly box. Measure twice, cut once.
- Forgetting Safety Glasses: A flying nail or wood splinter can cause serious eye injury. Always wear them.
- Rushing the Process: Take your time with each step, especially measuring, cutting, and nailing.
- Nailing Through the Side Panel into the End Grain: Ensure you are driving nails into the end grain of the receiving piece for maximum strength.
- Not Using Glue: Wood glue adds significant strength to joints. It’s a simple addition that greatly improves durability.
- Ignoring Clamps: Clamps are essential for holding pieces square and tight while you nail, ensuring strong, gap-free joints.
Customization and Further Projects
Once you’ve mastered the basic storage box, the possibilities for customization are endless.
Ideas for Customization:
- Handles: Add rope handles or sturdy wooden handles for easier carrying.
- Lid Options: Create a hinged lid, a sliding lid, or a lift-off lid.
- Dividers: Install internal dividers to organize contents.
- Finishing: Sand thoroughly and apply paint, stain, or a clear protective finish for longevity and aesthetics.
- Reinforcement: Add corner braces or decorative metal brackets for extra strength and visual appeal.
Next Steps in Your Woodworking Journey:
- Building a Tool Chest: A larger, more robust version of the storage box, often with compartments and a lid.
- Creating Shelving Units: Learn to build simple shelves for your home or garage.
- Making a Planter Box: A fantastic outdoor project that requires weather-resistant wood and proper drainage.
Building a storage box with a hammer is more than just a woodworking project; it’s an introduction to the fundamental principles of construction. It’s a testament to the power of simple tools and the satisfaction of creating something tangible with your own hands. So, grab your hammer, select your wood, and embark on this rewarding journey.