TITLE: Mastering the Art: How to Hang Picture Frames with a Hammer Like
Must-Have Tools in Your House If You Work Regularly


html
<h2>Key Facts/Comparison</h2>
<table>
<thead>
<tr>
<th>Feature</th>
<th>Hammer</th>
<th>Other Tools (e.g., Nail Gun, Screw & Anchor)</th>
</tr>
</thead>
<tbody>
<tr>
<td>Primary Use</td>
<td>Driving nails, light demolition</td>
<td>Automated fastening, secure heavy loads</td>
</tr>
<tr>
<td>Skill Level Required</td>
<td>Beginner to Intermediate</td>
<td>Intermediate to Advanced (depending on tool)</td>
</tr>
<tr>
<td>Speed</td>
<td>Moderate</td>
<td>Fast (especially nail gun)</td>
</tr>
<tr>
<td>Precision</td>
<td>Requires steady hand</td>
<td>High (nail gun), Moderate (screw/anchor)</td>
</tr>
<tr>
<td>Wall Damage Potential</td>
<td>Low to Moderate (if missed)</td>
<td>Low (nail gun), Very Low (screw/anchor)</td>
</tr>
<tr>
<td>Cost</td>
<td>Low</td>
<td>Moderate to High</td>
</tr>
<tr>
<td>Versatility</td>
<td>High (various tasks)</td>
<td>Specific to fastening</td>
</tr>
</tbody>
</table>
<h2>Steps/Pros-Cons</h2>
<table>
<thead>
<tr>
<th>Step</th>
<th>Description</th>
<th>Pros</th>
<th>Cons</th>
</tr>
</thead>
<tbody>
<tr>
<td>1. Gather Supplies</td>
<td>Ensure you have a hammer, picture hook/nail, and the picture frame.</td>
<td>Simple preparation.</td>
<td>Missing a tool can halt the process.</td>
</tr>
<tr>
<td>2. Mark the Wall</td>
<td>Determine the desired height and position for your frame and mark it lightly with a pencil.</td>
<td>Ensures correct placement.</td>
<td>Incorrect marking leads to misalignment.</td>
</tr>
<tr>
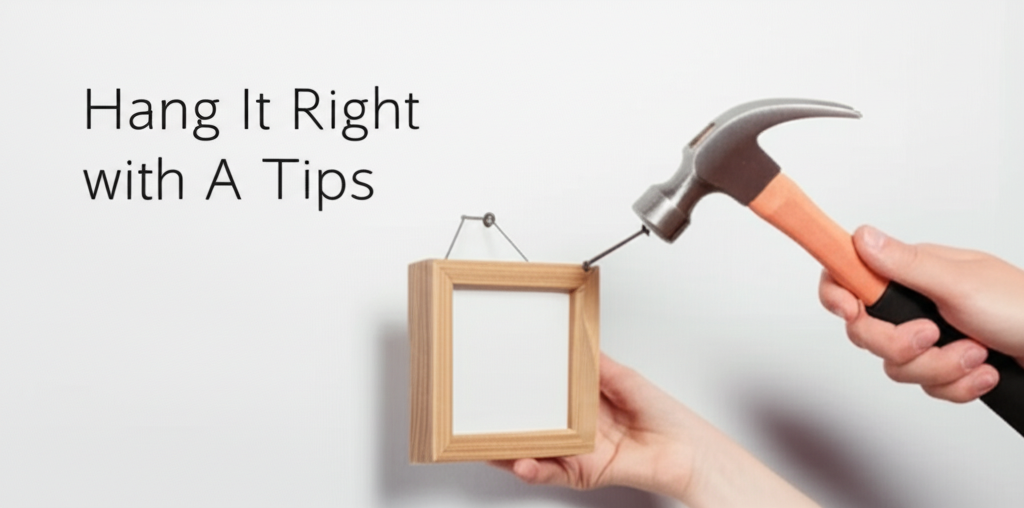
<td>3. Position the Hook/Nail</td>
<td>Place the tip of the nail or the picture hook at the marked spot.</td>
<td>Precise starting point.</td>
<td>Can be tricky to hold steady.</td>
</tr>
<tr>
<td>4. Hammer the Nail</td>
<td>Gently tap the nail head with the hammer, gradually increasing force until it's securely in the wall.</td>
<td>Effective for most standard frames.</td>
<td>Risk of hitting your fingers; can bend nail if not straight.</td>
</tr>
<tr>
<td>5. Hang the Frame</td>
<td>Place the wire or hanger of the picture frame onto the nail or hook.</td>
<td>Simple and direct.</td>
<td>Frame might be crooked if nail isn't level.</td>
</tr>
<tr>
<td>Post-Hanging Check</td>
<td>Ensure the frame is level and secure. Adjust as needed.</td>
<td>Guarantees a good final look.</td>
<td>May require re-hammering or repositioning.</td>
</tr>
</tbody>
</table>