Installing curtain rods might seem like a straightforward DIY project, but a few key steps, especially when using a hammer, can make all the difference between a secure, stylish window treatment and a sagging disaster. This comprehensive guide will walk you through the entire process, focusing on leveraging the humble hammer effectively and safely for a professional finish. Whether you’re a seasoned DIYer or tackling your first home improvement task, this article will equip you with the knowledge to hang your curtains with confidence.
Must-Have Tools in Your House If You Work Regularly


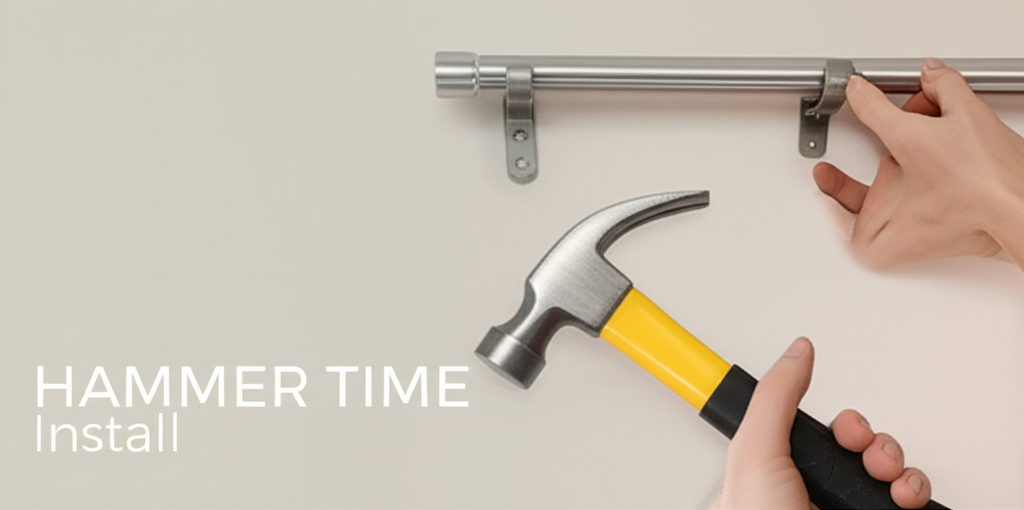
Why a Hammer? The Unsung Hero of Curtain Rod Installation
While drills and power drivers are often associated with home renovations, a hammer remains an indispensable tool for installing curtain rods, particularly for tasks involving anchors and securing brackets. Its simplicity, affordability, and versatility make it the go-to choice for many homeowners.
The Versatility of the Hammer
A hammer isn’t just for pounding nails. When installing curtain rods, its primary functions include:
- Driving Wall Anchors: Most curtain rod brackets require wall anchors to provide a secure grip in drywall. A hammer is the most efficient tool for gently tapping these anchors into place without damaging the wall.
- Securing Brackets: Once anchors are in, the hammer is used to drive screws through the bracket and into the anchors.
- Minor Adjustments: Sometimes, brackets might need a slight nudge to align perfectly. A gentle tap with the hammer can achieve this.
- Temporary Securing: In some instances, you might use a hammer and a temporary nail to hold a bracket in place while you mark screw holes.
When to Choose a Hammer Over a Drill
While a drill can also drive screws, a hammer offers more control for delicate tasks like seating wall anchors. Over-drilling can strip the anchor or damage the drywall. The controlled force of a hammer allows for precise seating, ensuring the anchor is snug but not over-tightened.
Preparation is Key: Gathering Your Tools and Materials
Before you even think about swinging a hammer, thorough preparation is crucial. This step ensures you have everything you need and minimizes potential frustration.
Essential Tools for the Job:
- Curtain Rod and Finials: The star of the show! Ensure it’s the correct length and style for your window.
- Curtain Rod Brackets: These usually come with the curtain rod, but it’s good to check.
- Hammer: A medium-sized claw hammer is ideal.
- Pencil: For marking.
- Measuring Tape: For accurate placement.
- Level: To ensure your rod is straight.
- Wall Anchors: Crucial for drywall installation. Choose anchors appropriate for your wall type and the weight of your curtains.
- Screws: Typically included with the brackets, but have extras on hand if needed.
- Stud Finder: Highly recommended to locate wall studs for the most secure installation.
- Safety Glasses: Always protect your eyes!
- Drop Cloth or Old Newspaper: To protect your floor from dust and debris.
Understanding Your Wall Type: Drywall vs. Studs
The method of installation will vary depending on whether you’re screwing into a wall stud or drywall.
- Wall Studs: These are the vertical wooden or metal beams that form the frame of your walls. Screwing directly into a stud provides the strongest possible hold for your curtain rod, especially for heavy curtains. A stud finder is your best friend here.
- Drywall: If a stud isn’t available at your desired bracket location, you’ll need to use wall anchors. These plastic or metal sleeves expand within the drywall as you screw into them, creating a secure grip.
Step-by-Step Guide: Installing Curtain Rods with a Hammer
Now that you’re prepared, let’s get down to business. Follow these steps carefully for a successful installation.
Step 1: Measure and Mark
Accurate measurements are paramount for a professional look.
- Determine Rod Placement: Decide how high above the window you want the rod. A common guideline is 4-6 inches above the frame, but this can vary for aesthetic preference or to accommodate blackout linings. Measure from the ceiling or the top of the window frame.
- Measure Window Width: Measure the width of your window frame.
- Calculate Rod Length: Your curtain rod should extend beyond the window frame by 3-6 inches on each side to allow curtains to be fully opened and to frame the window attractively. Add this extension to your window width measurement to determine the total rod length.
- Mark Bracket Positions: Hold the curtain rod up to the desired height or use its length to estimate bracket placement. Use your level to ensure the rod will be straight. Mark the screw hole locations for each bracket with your pencil. Typically, one bracket goes at each end, and one in the center if the rod is long or the curtains are heavy.
Step 2: Locate Studs (If Possible)
Using your stud finder, scan the wall at your marked bracket locations. If the stud finder indicates a stud, mark its center.
Step 3: Install Wall Anchors (If No Stud)
If you don’t hit a stud at a marked location:
- Choose the Right Anchor: Select anchors designed for the weight of your curtains. For lightweight curtains, plastic expansion anchors are often sufficient. For heavier drapes, toggle bolts or molly bolts might be necessary.
- Create a Pilot Hole: If the anchor instructions specify, use a drill bit slightly smaller than the anchor to create a pilot hole. If not, you may be able to gently tap the anchor directly into the drywall.
- Insert the Anchor: Place the anchor flush against the wall. Using your hammer, gently tap the anchor into the pilot hole. Apply even pressure. Avoid excessive force, which can push the anchor too deep or damage the drywall. The goal is to seat the anchor so it’s flush with the wall surface.
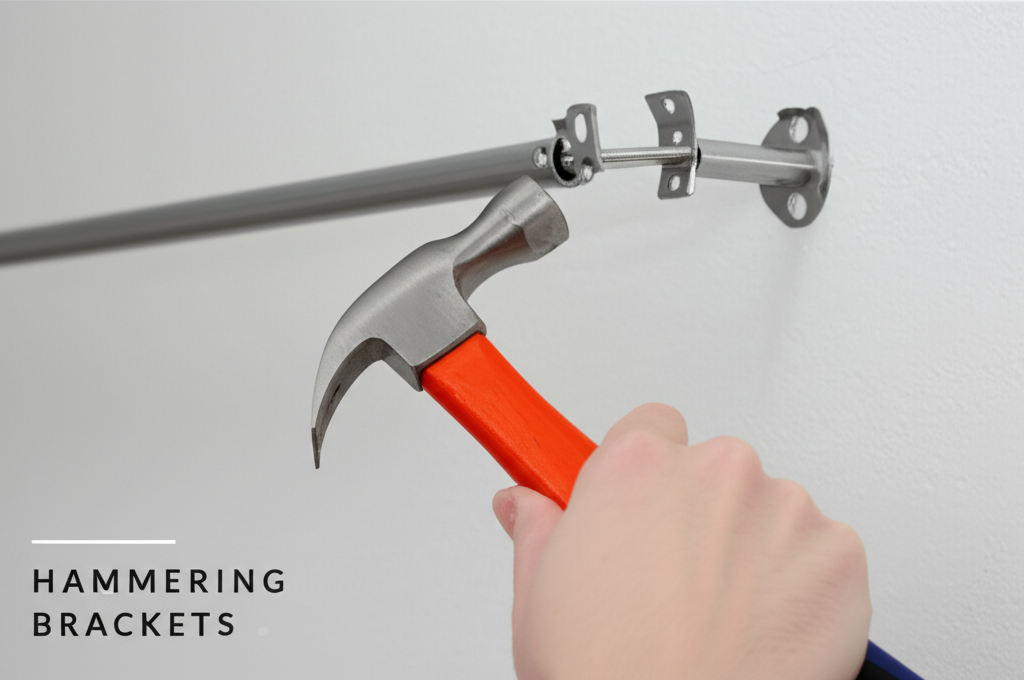
Step 4: Attach the Brackets
This is where your hammer really shines:
- Align the Bracket: Position the bracket over the anchor (or directly on the stud if you found one). Ensure the screw holes align.
- Start the Screw: Place a screw into the bracket’s hole and into the anchor or stud. You can start the screw by hand or use the tip of your hammer to gently guide it.
- Drive the Screw with the Hammer: Once the screw is started, switch to your hammer. Hold the screw head firmly with the claw of the hammer or use it to gently tap the screw straight into the anchor or stud. Work slowly and steadily, ensuring the screw goes in straight.
- Tighten the Screw: Continue hammering until the screw head is snug against the bracket, but do not over-tighten, as this can strip the anchor or damage the drywall. If you’re screwing into a stud, you can exert a bit more force, but still be mindful.
- Repeat for All Brackets: Install all brackets in this manner, using your level to ensure they are all at the same height and aligned with each other.
Step 5: Hang the Curtain Rod
Once all brackets are securely attached, slide the curtain rod through your curtains and place it into the brackets. Secure the rod if your brackets have a locking mechanism.
Step 6: Add Finials and Test
Attach the decorative finials to the ends of the rod. Gently pull on the rod to ensure it’s secure. Then, hang your curtains and test the operation by opening and closing them.
Key Facts and Comparison
Here’s a quick overview of essential considerations when installing curtain rods:
| Factor | Consideration | Hammer’s Role |
|---|---|---|
| Wall Type | Drywall vs. Stud | Essential for driving anchors into drywall; helpful for starting screws into studs. |
| Anchors | Type and weight capacity | Used to gently tap anchors into place, ensuring proper seating. |
| Bracket Security | Holding power | Drives screws securely into anchors or studs, providing firm bracket attachment. |
| Control | Precision vs. Speed | Offers more precise control for seating anchors compared to a drill. |
| Ease of Use | Skill level required | Generally easier for beginners to control than a power drill for delicate tasks. |
Troubleshooting Common Issues
Even with careful planning, you might encounter minor hiccups. Here’s how to address them:
1. Bracket Feels Loose
- Cause: Anchor not fully seated, wrong anchor size, or over-tightened screw.
- Solution: Remove the screw and bracket. Gently tap the anchor further in with your hammer if it protrudes. If the hole is too large, you may need to use a larger anchor or wall plug. Ensure you’re not over-tightening the screw.
2. Drywall Crumbles
- Cause: Hammering too hard on the anchor, or the drywall is old and fragile.
- Solution: Remove the damaged anchor and clean up the crumbled drywall. You might need to use a wall repair kit to patch the area before inserting a new anchor. Consider using a different anchor type or a larger one to bridge the damaged area.
3. Screw Won’t Go In Straight
- Cause: Starting the screw at an angle.
- Solution: Remove the screw and re-start it, ensuring it’s perfectly perpendicular to the wall. Use the tip of your hammer or a screw-holding screwdriver attachment to guide it initially.
Pros and Cons of Using a Hammer for Curtain Rod Installation
While effective, it’s good to weigh the advantages and disadvantages.
| Pros | Cons |
|---|---|
| Precise Control: Excellent for gently seating wall anchors without over-driving. | Slower: Can be more time-consuming than using a power drill for multiple screws. |
| No Power Required: Accessible even without electricity. | Requires Physical Effort: Can be tiring for extensive installations. |
| Cost-Effective: Hammers are inexpensive and readily available. | Potential for Damage: Over-enthusiastic hammering can damage walls or anchors. |
| Simplicity: Easy to learn and use for basic tasks. | Limited Torque: May struggle with very tough materials or extremely long screws without pre-drilling. |
Safety First!
Always prioritize safety when using any tool, including a hammer.
- Wear Safety Glasses: Protect your eyes from flying debris or stray nails.
- Clear the Area: Ensure children and pets are out of the immediate vicinity.
- Proper Grip: Hold the hammer firmly but not too tightly.
- Controlled Swings: Use controlled, deliberate swings rather than wild, forceful ones.
- Check for Obstructions: Be aware of electrical wires or plumbing pipes behind the wall, though this is more critical during drilling than gentle hammering.
Advanced Tips for a Flawless Finish
Want to take your curtain rod installation to the next level?
- Curtain Rod Color Coordination: Choose rod colors that complement your curtains or decor.
- Dealing with Plaster Walls: Plaster walls are harder and can be more brittle. Use appropriate anchors and be extra gentle when hammering. Pre-drilling is often more critical here.
- Using Heavy Drapery: For very heavy curtains, ensure you are hitting studs or using heavy-duty anchors with a high weight rating. Consider adding an extra bracket in the middle of a long rod.
- Cleaning Up: Use a vacuum or dustpan and brush to clean up any dust or debris created during the installation.
Conclusion: Mastering the Hammer for Beautiful Windows
Installing curtain rods with a hammer is a classic DIY skill that, when executed with care and precision, yields excellent results. By understanding the proper techniques for using your hammer with wall anchors and screws, you can ensure your curtain rods are not only functional but also a beautiful and secure addition to your home. Remember to prepare, measure twice, and hammer with control. Happy decorating!