Introduction: The Humble Hammer – A Fence Repair Essential
A sturdy fence provides security, defines boundaries, and enhances the aesthetic appeal of any property. Over time, however, even the most robust fences can succumb to the elements, accidental damage, or simple wear and tear. While modern tools offer specialized solutions, the venerable hammer remains an indispensable ally for fence repair. This guide delves into the multifaceted ways a hammer can be your primary tool in restoring your fence’s integrity and appearance. From re-securing loose boards to replacing damaged posts, understanding the hammer’s capabilities empowers you to tackle common fence issues efficiently and effectively.
Must-Have Tools in Your House If You Work Regularly


Understanding Your Hammer: Anatomy and Purpose
Before embarking on fence repair, it’s crucial to familiarize yourself with the different parts of a hammer and their functions. This understanding ensures you select the right tool for the job and use it safely and effectively.
Hammer Anatomy
- Head: The weighted metal part of the hammer. It typically consists of two main sections:
- Face: The flat striking surface used to drive nails.
- Claw: The curved or V-shaped end used for prying out nails.
- Neck: The tapered section connecting the head to the handle.
- Handle: The part you grip. Handles can be made from wood, fiberglass, or steel, each offering different levels of shock absorption and durability.
Choosing the Right Hammer
For most fence repair tasks, a claw hammer is the go-to tool. Its versatility makes it suitable for driving and removing nails, which are common in fence construction and repair.
- Weight: A medium-weight hammer (around 16-20 ounces) offers a good balance of power and control for driving nails into wood. Too light, and you’ll struggle; too heavy, and you risk overstriking or fatigue.
- Handle Material:
- Wood: Traditional and offers good shock absorption, but can splinter or break.
- Fiberglass: Durable, lightweight, and provides excellent vibration dampening.
- Steel: The most durable but can transmit more shock.
Common Fence Problems and How a Hammer Can Help
Fences face a barrage of challenges, from loose pickets to leaning posts. A hammer, combined with the right fasteners, can address many of these issues.
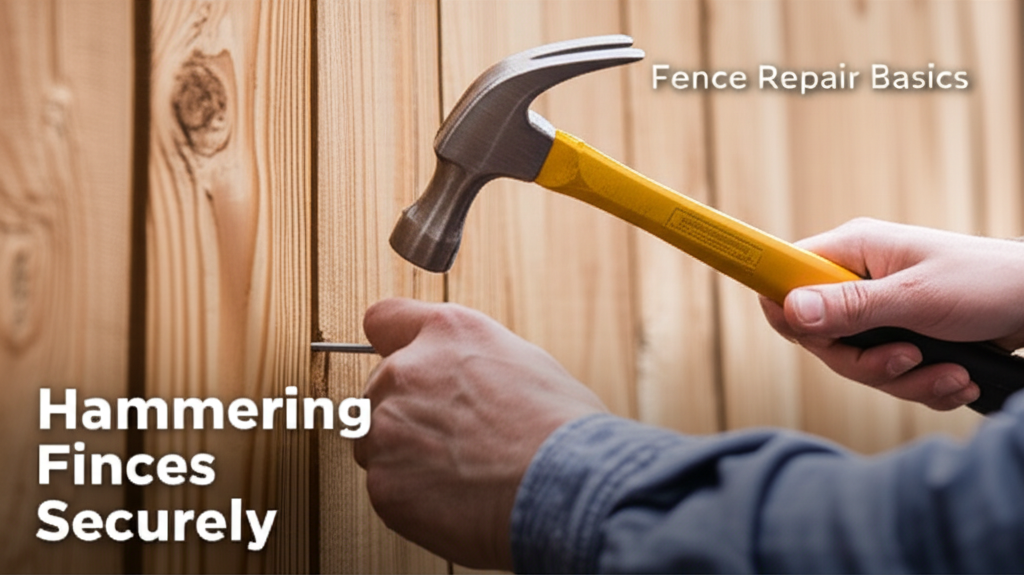
Securing Loose Boards and Pickets
This is arguably the most frequent fence repair. Weathering, expansion and contraction of wood, and impacts can loosen nails, causing boards to sag or detach.
- The Process:
- Assess: Identify the loose board and the nails that have pulled out or are no longer secure.
- Straighten: Gently reposition the loose board or picket.
- Re-nail: Use your hammer to drive new nails or re-drive existing ones that are still in place but loose. Aim for pre-drilled holes if possible, or place nails slightly away from the old holes to ensure a firm grip.
- Consider Longer/Thicker Nails: If the wood is significantly deteriorated, longer or slightly thicker galvanized nails might provide a stronger hold.
Re-attaching Splayed or Damaged Posts
A post that has started to lean or splay can compromise the entire fence section. While significant structural issues might require replacement, a hammer can help with minor stabilization.
- The Process:
- Brace: Use temporary braces (scrap wood and screws/nails) to hold the post upright.
- Drive Stakes: Hammer sturdy stakes into the ground at an angle, on the opposite side of the lean, and secure them to the post with nails or screws. This provides initial support.
- Re-nail Bracing: If the post is attached to horizontal rails, use the hammer to drive nails through the rails into the post, ensuring they are driven straight and flush.
Repairing Rails and Stringers
Horizontal rails (or stringers) connect the posts and support the vertical pickets. These can crack or break, requiring re-securing or reinforcement.
- The Process:
- Splinting: For cracked rails, place a piece of sturdy scrap wood (a “splint”) along the crack, on the side opposite the pickets if possible, to bridge the damaged area.
- Nail Securely: Use your hammer to drive nails through the splint and into the rail on both sides of the crack. Ensure the nails are long enough to penetrate both pieces of wood effectively.
- Reinforce Connections: If a rail has pulled away from a post, use the hammer to drive nails through the rail into the post, ensuring a strong connection.
Minor Structural Reinforcement
A hammer is essential for adding bracing or reinforcing weakened joints.
- The Process:
- Diagonal Bracing: For added stability, particularly in high-wind areas, hammer diagonal braces (pieces of wood) between posts and rails. Drive nails at each connection point.
- Corner Reinforcement: If fence corners are wobbly, consider adding triangular bracing pieces hammered into place at the corners.
Key Facts and Comparisons: Hammering for Fence Repair
The effectiveness of hammer-based fence repair often hinges on the type of fastener used. Here’s a look at common fasteners and their suitability.
| Fastener Type | Description | Hammering Suitability | Pros for Fences | Cons for Fences |
|---|---|---|---|---|
| Common Nails | Smooth shank, typically steel. | Easy to drive. | Readily available, inexpensive. | Prone to loosening over time due to wood expansion/contraction; can rust and stain wood if not galvanized. |
| Ring Shank Nails | Feature rings or barbs on the shank. | Require more force to drive; excellent holding power. | Significantly resist withdrawal, ideal for high-stress areas or areas prone to movement. | Can be harder to drive; removal can damage wood. |
| Screw Nails | Combination of nail and screw, with a helical shank. | Require moderate force; act like screws when driven. | Offer good holding power and some resistance to withdrawal. | More expensive than common nails; can bend if not driven straight. |
| Galvanized Nails | Coated with zinc to prevent rust. | Drive like their non-galvanized counterparts. | Resist rust and staining, crucial for outdoor applications to maintain wood appearance and integrity. | Coating can sometimes flake off if hammered too hard. |
Safety First: Hammering with Precision and Care
Working with hammers, especially outdoors on uneven surfaces, requires a strong emphasis on safety to prevent injuries.
- Wear Safety Glasses: Always protect your eyes from flying debris, nail fragments, or accidental slips.
- Secure Your Workpiece: Ensure loose boards or pickets are stable before hammering. Use clamps or temporary supports if necessary.
- Proper Stance: Stand with your feet shoulder-width apart for balance. Keep your body balanced and avoid overreaching.
- Grip the Hammer Correctly: Hold the handle towards the end for maximum leverage and control. A grip too close to the head reduces swing power.
- Swing Smoothly: Use a fluid motion from your shoulder and elbow, not just your wrist. Aim for a direct, perpendicular strike on the nail head.
- Be Mindful of Your Surroundings: Ensure no one is standing too close and that you won’t accidentally strike yourself or others.
- Check for Electrical Lines: Before hammering near existing structures or into the ground, be aware of any underground or overhead electrical lines.
- Nail Starter: For difficult-to-start nails, use pliers or a nail holder to keep the nail steady until it’s sufficiently embedded for your hammer to take over.
Advanced Techniques and Considerations
Beyond basic hammering, a few advanced tips can elevate your fence repair skills.
Hammering at an Angle
When driving nails into end grain or at joints, angling the nail slightly can improve its holding power. Similarly, when toe-nailing (driving a nail at an angle to join two pieces), a well-placed, angled nail can be very effective.
Using the Claw for Nail Removal
The claw of your hammer is designed for extracting nails.
- The Process:
- Position the Claw: Slide the claw under the nail head.
- Leverage: Use the hammer head as a fulcrum. For better leverage and to protect the wood surface, place a scrap piece of wood or a putty knife under the hammer head.
- Pull Straight: Pull the handle back in a smooth, controlled motion.
- Stubborn Nails: For nails that are difficult to remove or have broken heads, you might need to drive them through the wood with a nail set and hammer, or use a pry bar for greater leverage.
Hammering Techniques for Different Wood Types
Hardwoods might require more force or pre-drilling to prevent splitting, while softer woods are more forgiving but might also be more prone to nail pull-out.
When Your Hammer Isn’t Enough: Recognizing Limitations
While versatile, a hammer has its limits in fence repair. Knowing when to bring in other tools or professional help is crucial for effective and lasting repairs.
When to Call a Professional or Use Other Tools
- Rotten Posts: If a fence post is significantly rotted at ground level or below, no amount of hammering will fix it. It needs replacement, which may involve digging and concrete.
- Severe Structural Damage: Large-scale collapse, extensive rot throughout the fence, or multiple leaning posts might indicate a need for a complete fence rebuild.
- Uneven Ground: For significant grading issues or posts that have heaved due to frost, a hammer alone won’t solve the underlying problem.
- Specialized Fasteners: Some repairs might benefit from screws, lag bolts, or specialized fencing nails that might require a drill or impact driver.
- Safety Concerns: If you are uncomfortable with heights, working with heavy materials, or dealing with potentially unstable structures, hiring a professional is the safest option.
Step-by-Step Fence Repair Using a Hammer: A Consolidated Guide
Here’s a summary of the typical steps involved in common hammer-based fence repairs.
| Step | Action | Hammer Use |
|---|---|---|
| 1 | Inspect and Identify: Locate loose boards, rails, or posts. Check for rot or significant damage. | Visual inspection; tapping with hammer can help identify hollow or loose sections. |
| 2 | Gather Materials: Ensure you have the correct fasteners (galvanized nails recommended), scrap wood for splints or bracing, and safety gear. | N/A (Preparation) |
| 3 | Prepare the Area: Clear debris around the fence. Temporarily brace any leaning posts. | Hammering stakes into ground for temporary bracing. |
| 4 | Address Loose Boards/Pickets: Reposition them and re-secure with nails. | Driving nails to reattach boards. |
| 5 | Repair Rails/Stringers: Splint cracks or re-nail to posts. | Driving nails to secure splints or reattach rails. |
| 6 | Reinforce as Needed: Add diagonal bracing for extra stability. | Driving nails to attach braces. |
| 7 | Check Stability: Gently push on the repaired sections to ensure they are secure. | Tapping to check for solid connections. |
| 8 | Clean Up: Remove temporary bracing and dispose of debris. | Using claw to remove any temporary nails if necessary. |
Conclusion: The Enduring Value of the Hammer in Fence Maintenance
The hammer, a tool as old as construction itself, continues to be a remarkably effective instrument for fence repair. Its direct, tactile nature allows for precise control in driving fasteners, securing loose components, and reinforcing the overall structure of your fence. By understanding the capabilities of your hammer, selecting the appropriate fasteners, and adhering to safety practices, you can confidently undertake many common fence repair tasks, extending the life and improving the appearance of your property’s boundary. While advanced techniques and other tools may be necessary for more complex issues, the humble hammer remains an invaluable starting point for maintaining a robust and attractive fence.