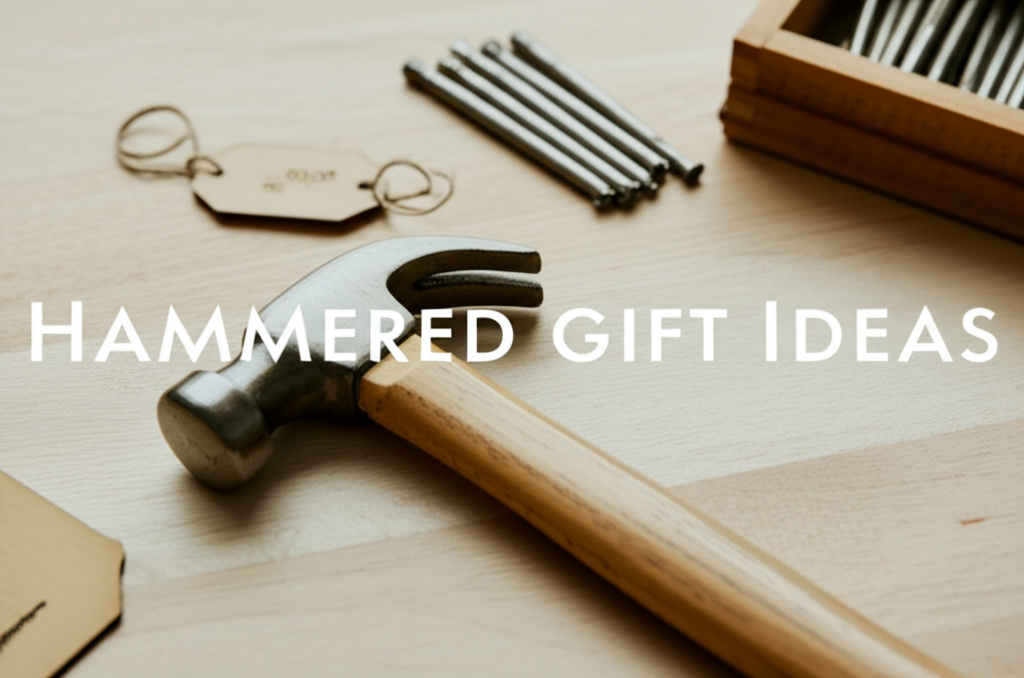
Introduction: Beyond the Ordinary – The Charm of Handmade
In a world increasingly dominated by mass-produced goods, there’s a unique and deeply satisfying joy in creating something truly personal and heartfelt. Personalized gifts speak volumes, conveying thoughtfulness, effort, and a genuine connection. While many might associate personalized gifts with intricate engraving machines or complex digital printing, the humble hammer, often overlooked in the realm of delicate crafting, offers a surprisingly versatile and accessible pathway to creating truly memorable presents. This article will explore the fascinating world of using a hammer for personalized gifts, from its historical significance to practical applications, safety tips, and creative project ideas that will inspire you to pick up this fundamental tool and forge something special.
Must-Have Tools in Your House If You Work Regularly


The Hammer: More Than Just a Tool for Construction
For many, the hammer conjures images of construction sites, carpentry, and brute force. However, its history is intertwined with artistry and craftsmanship. Early hammers were used for shaping metal, carving stone, and even creating intricate patterns on bone and wood. The rhythmic strike of a hammer, when wielded with intention, can transform raw materials into objects of beauty and sentiment. In the context of personalized gifts, the hammer’s ability to impress, shape, and join makes it an invaluable asset for a DIY enthusiast. Its tactile nature allows for a direct connection with the material, imbuing the final product with a tangible sense of the creator’s touch.
Key Techniques: Imprinting Your Mark with a Hammer
The magic of using a hammer for personalized gifts lies in its ability to transfer designs, words, and patterns onto various surfaces. This is primarily achieved through the use of stamps. These are typically made of hardened steel, metal, or even durable plastic, and they feature raised lettering, numbers, or decorative motifs.
Metal Stamping: A Timeless Appeal
Metal stamping is perhaps the most popular and effective method for personalizing gifts with a hammer. This technique involves using metal stamps to imprint letters, numbers, or designs onto soft metals like aluminum, brass, copper, or pewter.
- How it Works: The metal is placed on a sturdy, flat surface – a steel bench block is ideal. The chosen stamp is positioned firmly on the metal, and the hammer is used to strike the top of the stamp. This impact forces the raised design of the stamp into the softer metal, leaving a permanent impression.
- Materials for Stamping:
Jewelry Blanks: These come in various shapes and sizes (discs, rectangles, hearts, etc.) and are perfect for pendants, bracelets, and keychains.
Metal Tags: Often used for pet ID tags, luggage tags, or decorative labels.
Coasters: Metal coasters can be personalized with names, dates, or special messages.
Spoons: Stamped spoon handles are a charming way to personalize cutlery for special occasions.
- Achieving Clean Impressions:
Consistent Strike: Aim for a firm, consistent strike to ensure the entire design is impressed.
Stamping Tape: Using a piece of masking tape over the stamp can help hold it in place and prevent slippage.
* Practice: It takes practice to get consistent results. Start with scrap metal to hone your technique.
Wood Stamping: Adding Rustic Charm
While metal stamping is more common, wood can also be personalized with a hammer, though the technique and materials differ.
- Wood Burning Stamps: These are essentially heated metal stamps that are pressed into wood to create a burnt, darkened impression. While not directly hammered, the principle of imprinting a design is similar.
- Small Metal Embossing Stamps: For lighter personalization, small metal embossing stamps can be gently tapped into softer woods to create subtle indentations. This is best for decorative purposes rather than deep, legible text.
Leather Stamping: A Classic Craft
Leather stamping is another area where the hammer shines.
- Leather Stamps: Similar to metal stamps, these are designed to be struck with a hammer to create raised or debossed designs on leather goods like wallets, belts, keychains, and journals.
- Technique: Leather often requires a bit of moisture to become more pliable for stamping. A light misting of water can help achieve a cleaner impression.
Other Hammer-Assisted Techniques
- Nail Artistry: For very rustic or folk-art inspired pieces, small nails can be hammered into wood to create patterns or spell out words.
- Riveting and Joining: While more functional, a hammer is essential for using rivets to join pieces of metal or leather, which can be a decorative element in itself.
Table 1: Key Facts and Comparison of Stamping Materials
| Feature | Metal Stamping (Aluminum, Brass, Copper) | Leather Stamping | Wood Stamping (Embossing) |
| :————— | :————————————— | :————— | :———————— |
| Durability | High | Moderate | Low |
| Ease of Use | Moderate (requires practice) | Moderate | Easy |
| Aesthetic | Bright, shiny, modern or vintage | Rich, natural, textured | Subtle, organic |
| Hammer Strike| Firm, consistent | Firm, controlled | Gentle |
| Ideal For | Jewelry, keychains, tags, coasters | Wallets, belts, journals, coasters | Decorative wood pieces |
| Surface Prep | Clean, flat surface (bench block) | Slightly dampened | Smooth surface |
| Cost | Moderate (stamps and blanks) | Moderate (stamps and leather) | Low (basic stamps) |
Project Ideas: Unleash Your Inner Artisan
The possibilities for personalized gifts using a hammer and stamps are virtually endless. Here are a few popular and accessible ideas:
Personalized Jewelry
- Initial Pendants: Stamp the first initial of a loved one onto a metal disc or heart charm.
- Anniversary Bracelets: Stamp significant dates or initials onto multiple charms that can be added to a bracelet.
- “Always” Necklaces: Stamp a meaningful word like “Always,” “Love,” or a special inside joke onto a metal bar pendant.
- Pet ID Tags: Create a unique and durable ID tag for a furry friend with their name and your contact information.
Home Decor and Kitchenware
- Custom Coasters: Personalize metal or even ceramic coasters (with specialized stamps) with names, monograms, or witty sayings.
- Stamped Spoons: Add a touch of vintage charm by stamping a message onto the handle of a silver or stainless steel spoon. These make unique gifts for bakers or collectors.
- Wooden Keepsake Boxes: Stamp decorative motifs or initials onto the lid of a wooden box to make it truly special.
Accessories and Keepsakes
- Leather Keychains: Stamp a name, date, or a small symbol onto a leather strip to create a durable and stylish keychain.
- Personalized Bookmarks: Stamp a quote or a name onto a metal bookmark for the avid reader in your life.
- Luggage Tags: Create durable and easily identifiable luggage tags with personalized information.
Table 2: Steps, Pros, and Cons of Hammer Stamping for Gifts
| Step/Consideration | Description | Pros | Cons |
| :—————– | :—————————————————————————————————————— | :——————————————————————– | :——————————————————————– |
| 1. Gather Supplies | Obtain appropriate metal stamps, a hammer, a sturdy stamping surface (bench block), and your chosen material (blank). | Wide variety of materials and stamp designs available. | Initial investment in quality stamps and equipment can be higher. |
| 2. Prepare Workspace | Ensure a stable, flat surface and good lighting. Protect your surface if not using a dedicated bench block. | Safety and proper technique are paramount for good results. | Requires dedicated space and can be noisy. |
| 3. Position Material | Place your metal blank or leather item on the stamping surface, ensuring it’s flat and stable. | Prevents movement during stamping, leading to cleaner impressions. | Might require practice to position perfectly. |
| 4. Place Stamp | Hold the stamp firmly against the material, ensuring it’s straight and centered. Consider using stamping tape. | Accuracy is key for legible and aesthetically pleasing results. | Slippage can lead to misaligned or smudged stamps. |
| 5. Strike Hammer | With a controlled, firm strike, hit the top of the stamp squarely with the hammer. | Creates a deep, clear, and permanent impression. | Overstriking or understriking can mar the impression. |
| 6. Finishing Touches | Remove excess metal burrs (if any) with a file or sandpaper. You can oxidize the stamped areas for contrast. | Enhances the visibility and professional look of the stamped design. | Requires careful sanding to avoid damaging the design. |
| Ease of Learning | Requires some practice and dexterity to achieve consistent results. | Rewarding to master and produce professional-looking items. | Steep learning curve for beginners to achieve perfect results. |
| Personalization Depth | Allows for unique and meaningful messages, names, dates, and symbols. | Creates truly bespoke and sentimental gifts. | Limited by the available stamp designs and font sizes. |
| Durability of Result | Metal stamping is very durable and long-lasting. Leather stamping is also quite robust. | The personalization will last for years to come. | Wood stamping impressions are more fragile. |
| Cost-Effectiveness | Can be cost-effective for creating multiple personalized items, especially compared to professional services. | DIY approach saves money on labor. | Initial purchase of stamps can be an upfront cost. |
| Creativity | Offers immense creative freedom in design and message. | You can combine different stamps and create unique layouts. | May be limited by the availability of specific or intricate stamps. |
Safety First: Hammering with Responsibility
While the act of hammering for crafts is generally safe, it’s crucial to prioritize safety to avoid accidents.
- Eye Protection: Always wear safety glasses. Tiny metal fragments or stray hammer blows can cause serious eye injury.
- Sturdy Surface: Use a solid, stable surface. A wobbly table is a recipe for disaster.
- Hammer Choice: Use a hammer appropriate for the task. A ball-peen hammer or a jeweler’s hammer is often suitable for stamping. Avoid overly heavy hammers.
- Grip: Maintain a firm grip on both the hammer and the stamp.
- Workspace: Ensure your workspace is well-lit and free of clutter. Keep children and pets away from the immediate crafting area.
- Proper Technique: Practice good posture and a controlled swing. Don’t overextend yourself.
- Stamp Quality: Use good quality stamps that are not chipped or damaged. Damaged stamps can break and fly off.
Beyond Stamping: Other Hammer-Related Gift Ideas
While stamping is the most direct way to use a hammer for personalization, consider these other creative applications:
- Nailed Art: On a piece of wood, create patterns or spell out words by carefully hammering small nails at intervals. You can then wrap string or wire around these nails to create intricate designs, a technique known as string art.
- Textured Surfaces: For a more abstract, artistic touch, use the side or claw of a hammer (carefully!) to create unique textures on softer metals or wood. This is for decorative purposes only and requires significant practice and control.
- Joining Elements: For projects involving leather or metal, a hammer is essential for setting rivets or attaching findings, which can themselves be personalized.
Tips for Success: Elevating Your Hammered Gifts
- Start Simple: Begin with basic letter stamps and simple shapes before tackling complex designs.
- Practice, Practice, Practice: Dedicate time to practicing on scrap materials. This will build your confidence and improve your results.
- Invest in Quality: Good quality stamps will make a significant difference in the clarity and durability of your impressions.
- Consider Contrast: For metal stamping, using an oxidizer (like liver of sulfur for silver or copper, or a special blackening solution for brass) can make the stamped letters stand out beautifully against the metal.
- Embrace Imperfection: Handmade items often have a charming uniqueness that comes from slight imperfections. Don’t strive for machine-like perfection; embrace the handmade quality.
- Think About Presentation: Package your hammered gifts thoughtfully. A nice box, a personalized tag, or a ribbon can enhance the overall presentation.
Conclusion: The Enduring Power of a Handmade Touch
Using a hammer for personalized gifts is a rewarding journey that connects you directly to the creation process. It’s a way to imbue your gifts with not just a name or a date, but with your time, effort, and affection. From elegant metal jewelry to rustic leather accessories, the humble hammer, in conjunction with thoughtfully chosen stamps, empowers you to create truly unique and cherished presents. So, dust off that hammer, gather your materials, and get ready to strike a chord of heartfelt gifting. The satisfaction of presenting a gift that you’ve made with your own hands, precisely shaped by the deliberate force of a hammer, is an experience unlike any other. It’s a tangible expression of love, a timeless craft, and a powerful way to make your gifts truly unforgettable.
html
<h2>Key Facts/Comparison: Using a Hammer for Personalized Gifts</h2>
<table>
<thead>
<tr>
<th>Feature/Aspect</th>
<th>Hammer Type</th>
<th>Suitability for Personalized Gifts</th>
<th>Key Considerations</th>
</tr>
</thead>
<tbody>
<tr>
<td>Primary Use</td>
<td>Claw Hammer</td>
<td>Moderate - Good for general crafting, tacking, and minor assembly. Less ideal for fine detail.</td>
<td>Versatile, common, good for rougher materials like wood.</td>
</tr>
<tr>
<td>Precision</td>
<td>Ball-Peen Hammer</td>
<td>Moderate - Useful for texturing metal blanks, stamping, or creating decorative patterns.</td>
<td>Requires practice for consistent results, good for metalworking.</td>
</tr>
<tr>
<td>Delicate Work</td>
<td>Mallet (Rubber/Wood)</td>
<td>High - Excellent for tapping delicate components, setting small pieces without damage, or creating subtle impressions.</td>
<td>Gentle impact, protects surfaces, good for intricate assembly.</td>
</tr>
<tr>
<td>Impact Control</td>
<td>Dead Blow Hammer</td>
<td>High - Provides controlled, non-rebounding strikes, ideal for precise tapping and assembly where overstrike is a concern.</td>
<td>Absorbs shock, reduces rebound, good for delicate adjustments.</td>
</tr>
<tr>
<td>Material Versatility</td>
<td>All</td>
<td>Varies by hammer type. Generally best for wood, metal, and sometimes soft plastics.</td>
<td>Consider the material of the item being personalized.</td>
</tr>
<tr>
<td>Aesthetic Impact</td>
<td>Varies</td>
<td>Can be used for stamping text/designs (ball-peen) or creating textures.</td>
<td>The choice of hammer can influence the visual outcome.</td>
</tr>
</tbody>
</table>
<h2>Steps/Pros-Cons: Using a Hammer for Personalized Gifts</h2>
<h3>Stamping Designs/Text on Metal</h3>
<table>
<thead>
<tr>
<th>Step</th>
<th>Description</th>
<th>Pros</th>
<th>Cons</th>
</tr>
</thead>
<tbody>
<tr>
<td>1. Preparation</td>
<td>Secure metal blank on a sturdy, flat surface (steel block recommended). Place stamp in desired position.</td>
<td>Ensures a stable surface for clear impressions.</td>
<td>Requires proper setup to avoid damage or uneven strikes.</td>
</tr>
<tr>
<td>2. Striking</td>
<td>Hold hammer vertically and strike the top of the stamp with a firm, controlled blow.</td>
<td>Creates a visible impression of the design/text.</td>
<td>Too light a strike may result in a faint impression; too hard can damage the stamp or metal.</td>
</tr>
<tr>
<td>3. Repetition</td>
<td>For longer text or complex designs, repeat strikes as needed, carefully aligning subsequent stamps.</td>
<td>Allows for multi-character personalization.</td>
<td>Requires consistent alignment and pressure for professional results.</td>
</tr>
<tr>
<td>4. Finishing</td>
<td>Clean up any rough edges or residue. Consider using a polishing compound for a smoother finish.</td>
<td>Enhances the overall appearance of the personalized item.</td>
<td>May require additional tools and time.</td>
</tr>
</tbody>
</table>
<h3>Assembling/Securing Components</h3>
<table>
<thead>
<tr>
<th>Step</th>
<th>Description</th>
<th>Pros</th>
<th>Cons</th>
</tr>
</thead>
<tbody>
<tr>
<td>1. Alignment</td>
<td>Position the components to be joined or secured.</td>
<td>Ensures the final assembly is accurate.</td>
<td>Improper alignment can lead to crooked or poorly fitting parts.</td>
</tr>
<tr>
<td>2. Gentle Tapping</td>
<td>Use a mallet or a hammer with a protective pad to gently tap components into place.</td>
<td>Prevents damage to delicate materials or finishes. Allows for fine adjustments.</td>
<td>May not be suitable for very tight or forceful fitting.</td>
</tr>
<tr>
<td>3. Securing Fasteners</td>
<td>If using small nails or brads, carefully tap them into the material using a hammer.</td>
<td>Provides a strong and reliable way to join materials.</td>
<td>Risk of bending nails or splitting wood if not done carefully. Requires precision.</td>
</tr>
<tr>
<td>4. Checking Fit</td>
<td>Periodically check the fit and stability of the assembled parts.</td>
<td>Ensures a quality finished product.</td>
<td>Adds to the overall time spent on the project.</td>
</tr>
</tbody>
</table>