The Unsung Hero: How a Hammer Contributes to Perfect Tile Installation
While the mention of tile installation might conjure images of trowels, grout, and maybe even tile cutters, the humble hammer often plays a crucial, albeit sometimes overlooked, role. Far from being a brute-force instrument, when used correctly, a hammer can be an invaluable tool for achieving a professional and durable tile finish. This article delves into the various ways a hammer is employed in tile setting, the types of hammers best suited for the job, and the essential techniques to ensure you’re using this powerful tool effectively and safely, avoiding common mistakes that can lead to cracked tiles or uneven surfaces.
Must-Have Tools in Your House If You Work Regularly


Understanding the Hammer’s Function in Tile Work
The primary functions of a hammer in tile installation revolve around setting, securing, and sometimes, correcting. It’s not about smashing tiles into place, but rather about applying controlled force to ensure proper adhesion and alignment.
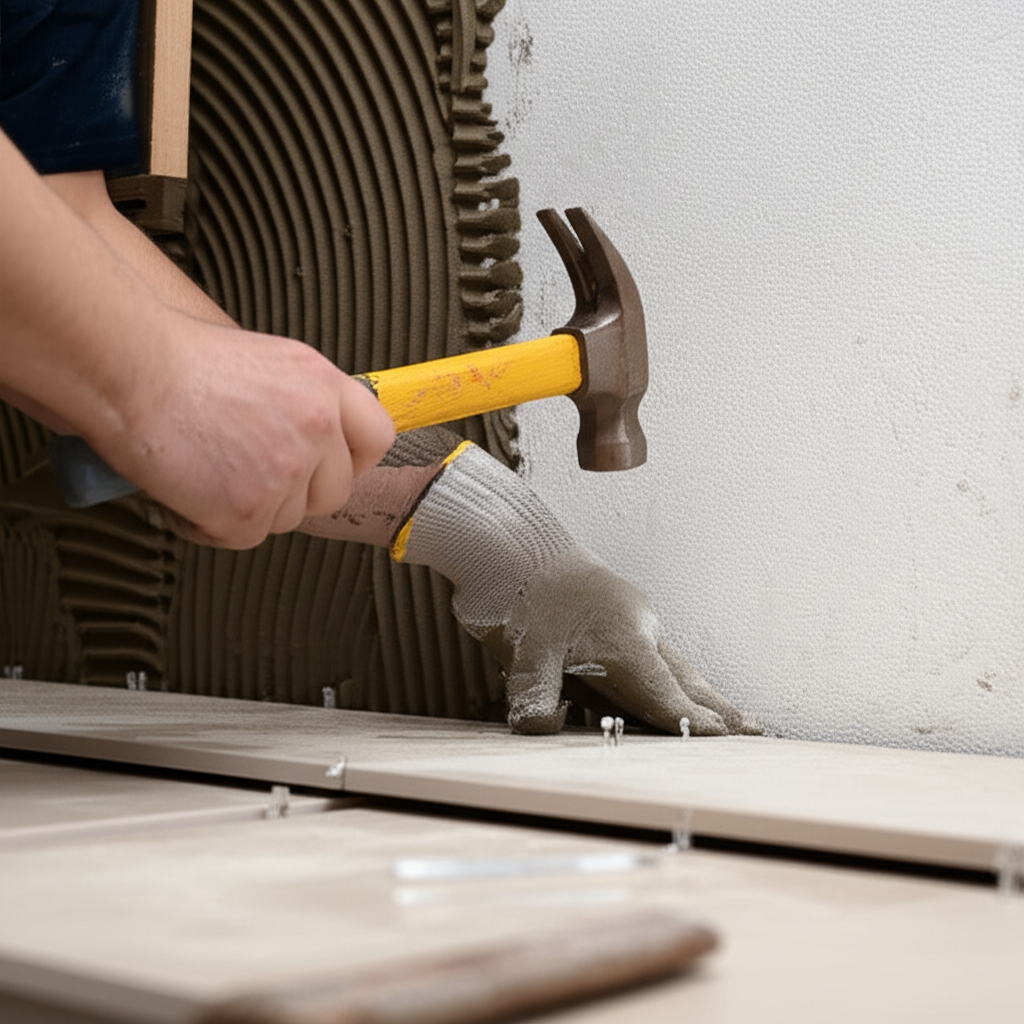
- Tapping Tiles for Adhesion: This is perhaps the most common use. After applying adhesive (mortar or thin-set) to the substrate and/or the back of the tile, a gentle tap with a rubber mallet or a hammer with a protective buffer is used to press the tile firmly into the adhesive. This action helps to:
- Spread the adhesive evenly under the tile, ensuring full coverage.
- Dislodge any trapped air bubbles, which can weaken the bond.
- Create a flat, level surface, especially when used in conjunction with a level.
- Seating Tiles: For larger format tiles or those with slight imperfections, a series of precise taps can help to seat the tile fully into the adhesive, ensuring it lies flush with surrounding tiles.
- Breaking and Shaping Tiles (with caution): While specialized tile nippers and wet saws are preferred for precise cuts, a hammer can be used in conjunction with a scoring tool for breaking tiles. This technique requires significant practice and is generally reserved for simple breaks or when a very specific, albeit rough, shape is needed.
- Loosening or Adjusting Tiles: If a tile is slightly out of place or needs to be removed for adjustment, a rubber mallet can be used to gently tap it into the correct position.
- Installing Tile Accessories: Some tile installation involves using specialized clips, spacers, or anchors that may require a light tap from a hammer to seat properly.
Key Hammer Types for Tile Installation
The “hammer” isn’t a one-size-fits-all tool for tiling. The type of hammer you use significantly impacts the outcome. Using the wrong type can lead to chipped edges, cracked tiles, or inadequate adhesion.
1. Rubber Mallets
The undisputed champion for most tile setting tasks, the rubber mallet is your go-to tool. Its primary advantage is its non-marring surface.
- Material: Constructed with a rubber head, it provides a cushioned impact that is firm enough to set tiles without damaging their delicate surfaces.
- Versatility: Ideal for tapping down tiles, ensuring even contact with the adhesive, and seating them flush with adjacent tiles.
- Control: The softer head allows for greater control over the force applied, minimizing the risk of cracking or chipping.
2. Masonry Hammers (with a striking face and a chisel end)
While not for general setting, a masonry hammer has a specific, albeit limited, role. It’s crucial to differentiate between the striking face and the chisel end.
- Striking Face: The flat end is used for striking chisels or other tools.
- Chisel End: The pointed or flattened chisel end is designed for breaking and chipping away at harder materials like concrete or brick.
- Use in Tiling: Primarily used for removing stubborn old adhesive, breaking away tiles during demolition, or very carefully scoring and breaking tiles when other tools are unavailable (this is a last resort). Never use the striking face directly on a tile to set it.
3. Standard Claw Hammers (with protective measures)
Generally not recommended for direct tile contact, a standard claw hammer can be used in specific situations, but requires extreme caution and protective measures.
- Striking Surface: The metal striking face is too hard for direct contact with most tiles.
- Protective Measures: If a claw hammer must be used for tapping, place a block of wood or a rubber pad between the hammer head and the tile.
- Limited Application: More likely to be used for tasks adjacent to tiling, such as securing backer board or for light demolition work.
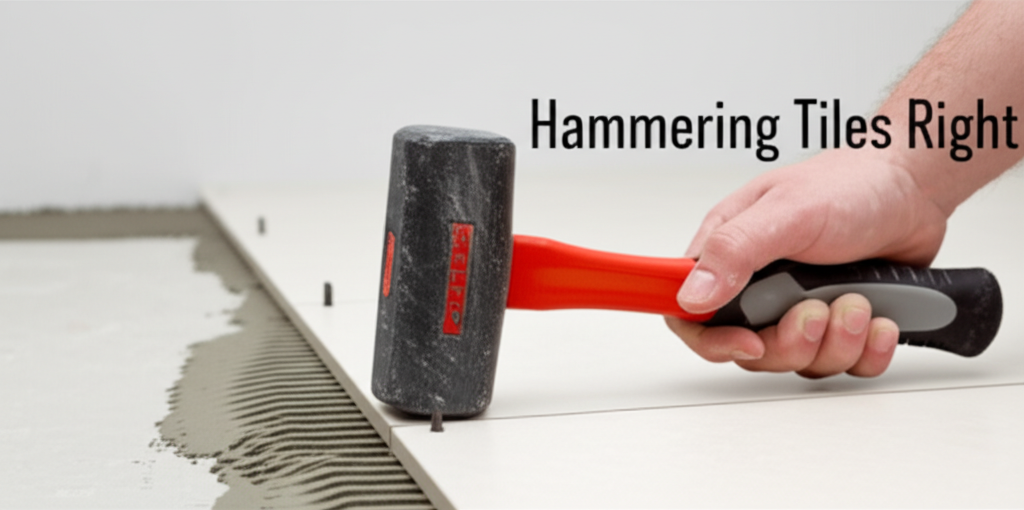
4. Dead Blow Hammers
These hammers have a head filled with shot or sand, which absorbs rebound shock. This makes them excellent for controlled tapping.
- Reduced Rebound: The shot inside the head absorbs the impact, delivering a more direct and controlled force without excessive bouncing.
- Even Distribution of Force: Ideal for ensuring consistent pressure across a tile.
- Non-Marring Heads: Often come with urethane or rubber faces.
| Hammer Type | Primary Use in Tiling | Advantages | Disadvantages | Cautionary Notes |
|---|---|---|---|---|
| Rubber Mallet | Setting tiles, seating, gentle adjustments | Non-marring, excellent control, reduces risk of damage | Less effective for breaking hard materials | Ensure the rubber is dense enough for firm tapping |
| Masonry Hammer (Chisel End) | Removing old adhesive, breaking tiles (limited) | Effective for demolition and stubborn material removal | Can easily damage tiles if used improperly, not for setting | NEVER use the striking face to set tiles. Use chisel for specific demolition tasks only. |
| Standard Claw Hammer | Securing backer board, general carpentry around tiling | Versatile for general construction tasks | High risk of tile damage if used for tapping; requires protective padding | Use with a wood block or rubber pad when any impact on or near tiles is necessary. |
| Dead Blow Hammer | Controlled tapping, seating large format tiles | Excellent shock absorption, uniform force delivery, non-marring heads available | Can be heavier than a rubber mallet | Choose one with a non-marring head for direct tile contact. |
Mastering the Technique: How to Use a Hammer for Perfect Tile Setting
The “how” is as crucial as the “what” when it comes to using hammers in tile installation. Improper technique can negate the benefits of using the right tool.
The Tapping Technique: Gentle Persuasion, Not Force
The goal of tapping a tile is to ensure it’s fully embedded in the adhesive, creating a strong, lasting bond.
- Apply Adhesive: Ensure the substrate and/or the back of the tile is evenly coated with the appropriate adhesive.
- Place the Tile: Carefully position the tile onto the adhesive bed.
- Use a Level: Place a spirit level on top of the tile to check for flatness and ensure it’s level with surrounding tiles.
- Gentle Taps: Using a rubber mallet (or a dead blow hammer with a soft face), deliver a series of light to moderate taps around the perimeter and center of the tile. The taps should be firm enough to settle the tile but not so hard as to crack it or push out all the adhesive.
- Listen and Feel: As you tap, pay attention to the sound and the feel. A solid, even sound indicates good contact. If you hear a hollow sound, it suggests a void under the tile, and more gentle tapping in that area might be needed.
- Check for Levelness: After tapping, re-check with your level. If the tile is slightly high, a few more gentle taps can help seat it. If it’s too low, you may need to lift it, adjust the adhesive, and re-seat it.
- Work in a Pattern: For larger tiles, tap in a circular motion or from the edges towards the center to ensure even distribution of pressure.
Breaking Tiles with a Hammer: A Controlled Approach (Use with Caution)
While not ideal for precise cuts, a hammer can be used for rough breaks when other tools are unavailable or for specific waste material.
- Scoring: Use a tile scorer (carbide-tipped wheel) to make a deep, consistent score line across the tile where you want it to break.
- Chisel and Hammer: Place the edge of a sharp chisel (a masonry hammer’s chisel end or a specialized tile chisel) along the scored line.
- Controlled Strike: Use a hammer (a standard hammer is often used here, but again, caution is paramount) to strike the top of the chisel. A sharp, firm tap is usually sufficient. The goal is to apply force precisely along the score line.
- Direction of Break: Aim the break away from the desired finished edge of the tile.
- Practice: This method requires practice and is best done on scrap tiles first. It often results in a less clean break than using a snap cutter.
Troubleshooting Common Issues and Avoiding Mistakes
Even with the right tools and techniques, mistakes can happen. Understanding common pitfalls can help you achieve a flawless finish.
Table of Steps, Pros, and Cons for Hammer Use in Tiling
This table summarizes the key considerations when using hammers in tile installation.
| Action | Recommended Hammer | Key Steps | Pros | Cons | Common Mistakes to Avoid |
|---|---|---|---|---|---|
| Setting Tiles for Adhesion | Rubber Mallet, Dead Blow Hammer (soft head) | Apply adhesive, place tile, tap gently with level check, listen for solid sound. | Ensures full adhesive coverage, removes air pockets, creates level surface. | Risk of cracking if too much force is used. | Excessive force, uneven tapping, tapping on unsupported edges. |
| Seating Large Format Tiles | Dead Blow Hammer (soft head), Rubber Mallet | Carefully position tile, use level, tap evenly around edges and center. | Achieves flush finish, ensures consistent contact across large surface. | Can be time-consuming to ensure perfect seating. | Not checking levelness frequently, uneven tapping, over-reliance on weight of tile. |
| Breaking Tiles (Rough Cuts) | Masonry Hammer (chisel end), standard hammer (with chisel) | Score tile accurately, position chisel on score, strike chisel with hammer. | Can break tiles when other tools are unavailable. | High risk of chipping, cracking, or uneven breaks; not precise. | Not scoring properly, using hammer directly on tile, too much force, no practice. |
| Removing Old Adhesive/Grout | Masonry Hammer (chisel end) | Place chisel on adhesive/grout, strike chisel with hammer to chip away material. | Effective for removing stubborn, hardened material. | Can damage substrate if not careful; slow process. | Chiseling into the substrate, using excessive force, not clearing debris. |
Common Mistakes and How to Avoid Them:
- Over-Tapping: Applying too much force with the hammer can crack tiles, especially porcelain or glass tiles, or push out too much adhesive, leaving insufficient bond. Solution: Use light, repeated taps, and always use a level to gauge progress.
- Using the Wrong Hammer: A metal hammer striking a tile directly will almost certainly cause damage. Solution: Stick to rubber mallets or dead blow hammers with soft faces for setting.
- Uneven Tapping: Focusing force on one area can lead to uneven seating and potential stress fractures. Solution: Tap around the tile in a consistent pattern.
- Ignoring Voids: Not tapping sufficiently can leave air pockets under the tile, weakening the bond and leading to future issues like hollow-sounding tiles or tile failure. Solution: Listen to the sound the tile makes as you tap. A solid, resonant sound is good; a dull, hollow sound indicates a void.
- Using the Hammer for Cutting: Attempting to “cut” tiles by repeatedly striking them with a hammer is imprecise and will likely result in a poor finish. Solution: Invest in a proper tile cutter or wet saw for accurate cuts.
- Forgetting Protection: When using a hammer for tasks near tiles (like installing wall anchors in adjacent concrete), always protect the tile surface with cardboard or a rubber mat.
Conclusion: The Hammer as a Tool of Precision
The hammer, when chosen and used appropriately, is not a blunt instrument but a tool that aids in precision and ensures the longevity of your tile installation. From the gentle persuasion of a rubber mallet to the controlled breaking power of a masonry hammer used with a chisel, understanding its role and mastering the technique will elevate your tiling projects. By prioritizing the right tool for the job, applying controlled force, and being mindful of the delicate nature of tile, you can harness the power of the hammer to achieve a professional, durable, and beautiful tiled surface. Remember, in tiling, it’s often the subtle, precise applications of force that make the biggest difference.